Search

Cooking Across 4 Generations

Using recipes collected from 4 generations of one family

Category

Recipes

Lemon Tart – Recipe Time

On our last menu was a luscious lemon tart which is served with some slightly sweetend mascarpone, pistachio praline and a slice of caramelised lemon. Not as heavy as the lemon curd tart we used to make but just as delicious.

All measurements are metric and spoon/cup measures are Australian Standards.

You will need a digital thermometer and food processor for this recipe.

LEMON TART

Pastry: (Enough for two and freezes well so you can make another one later)

Flour – 300grams

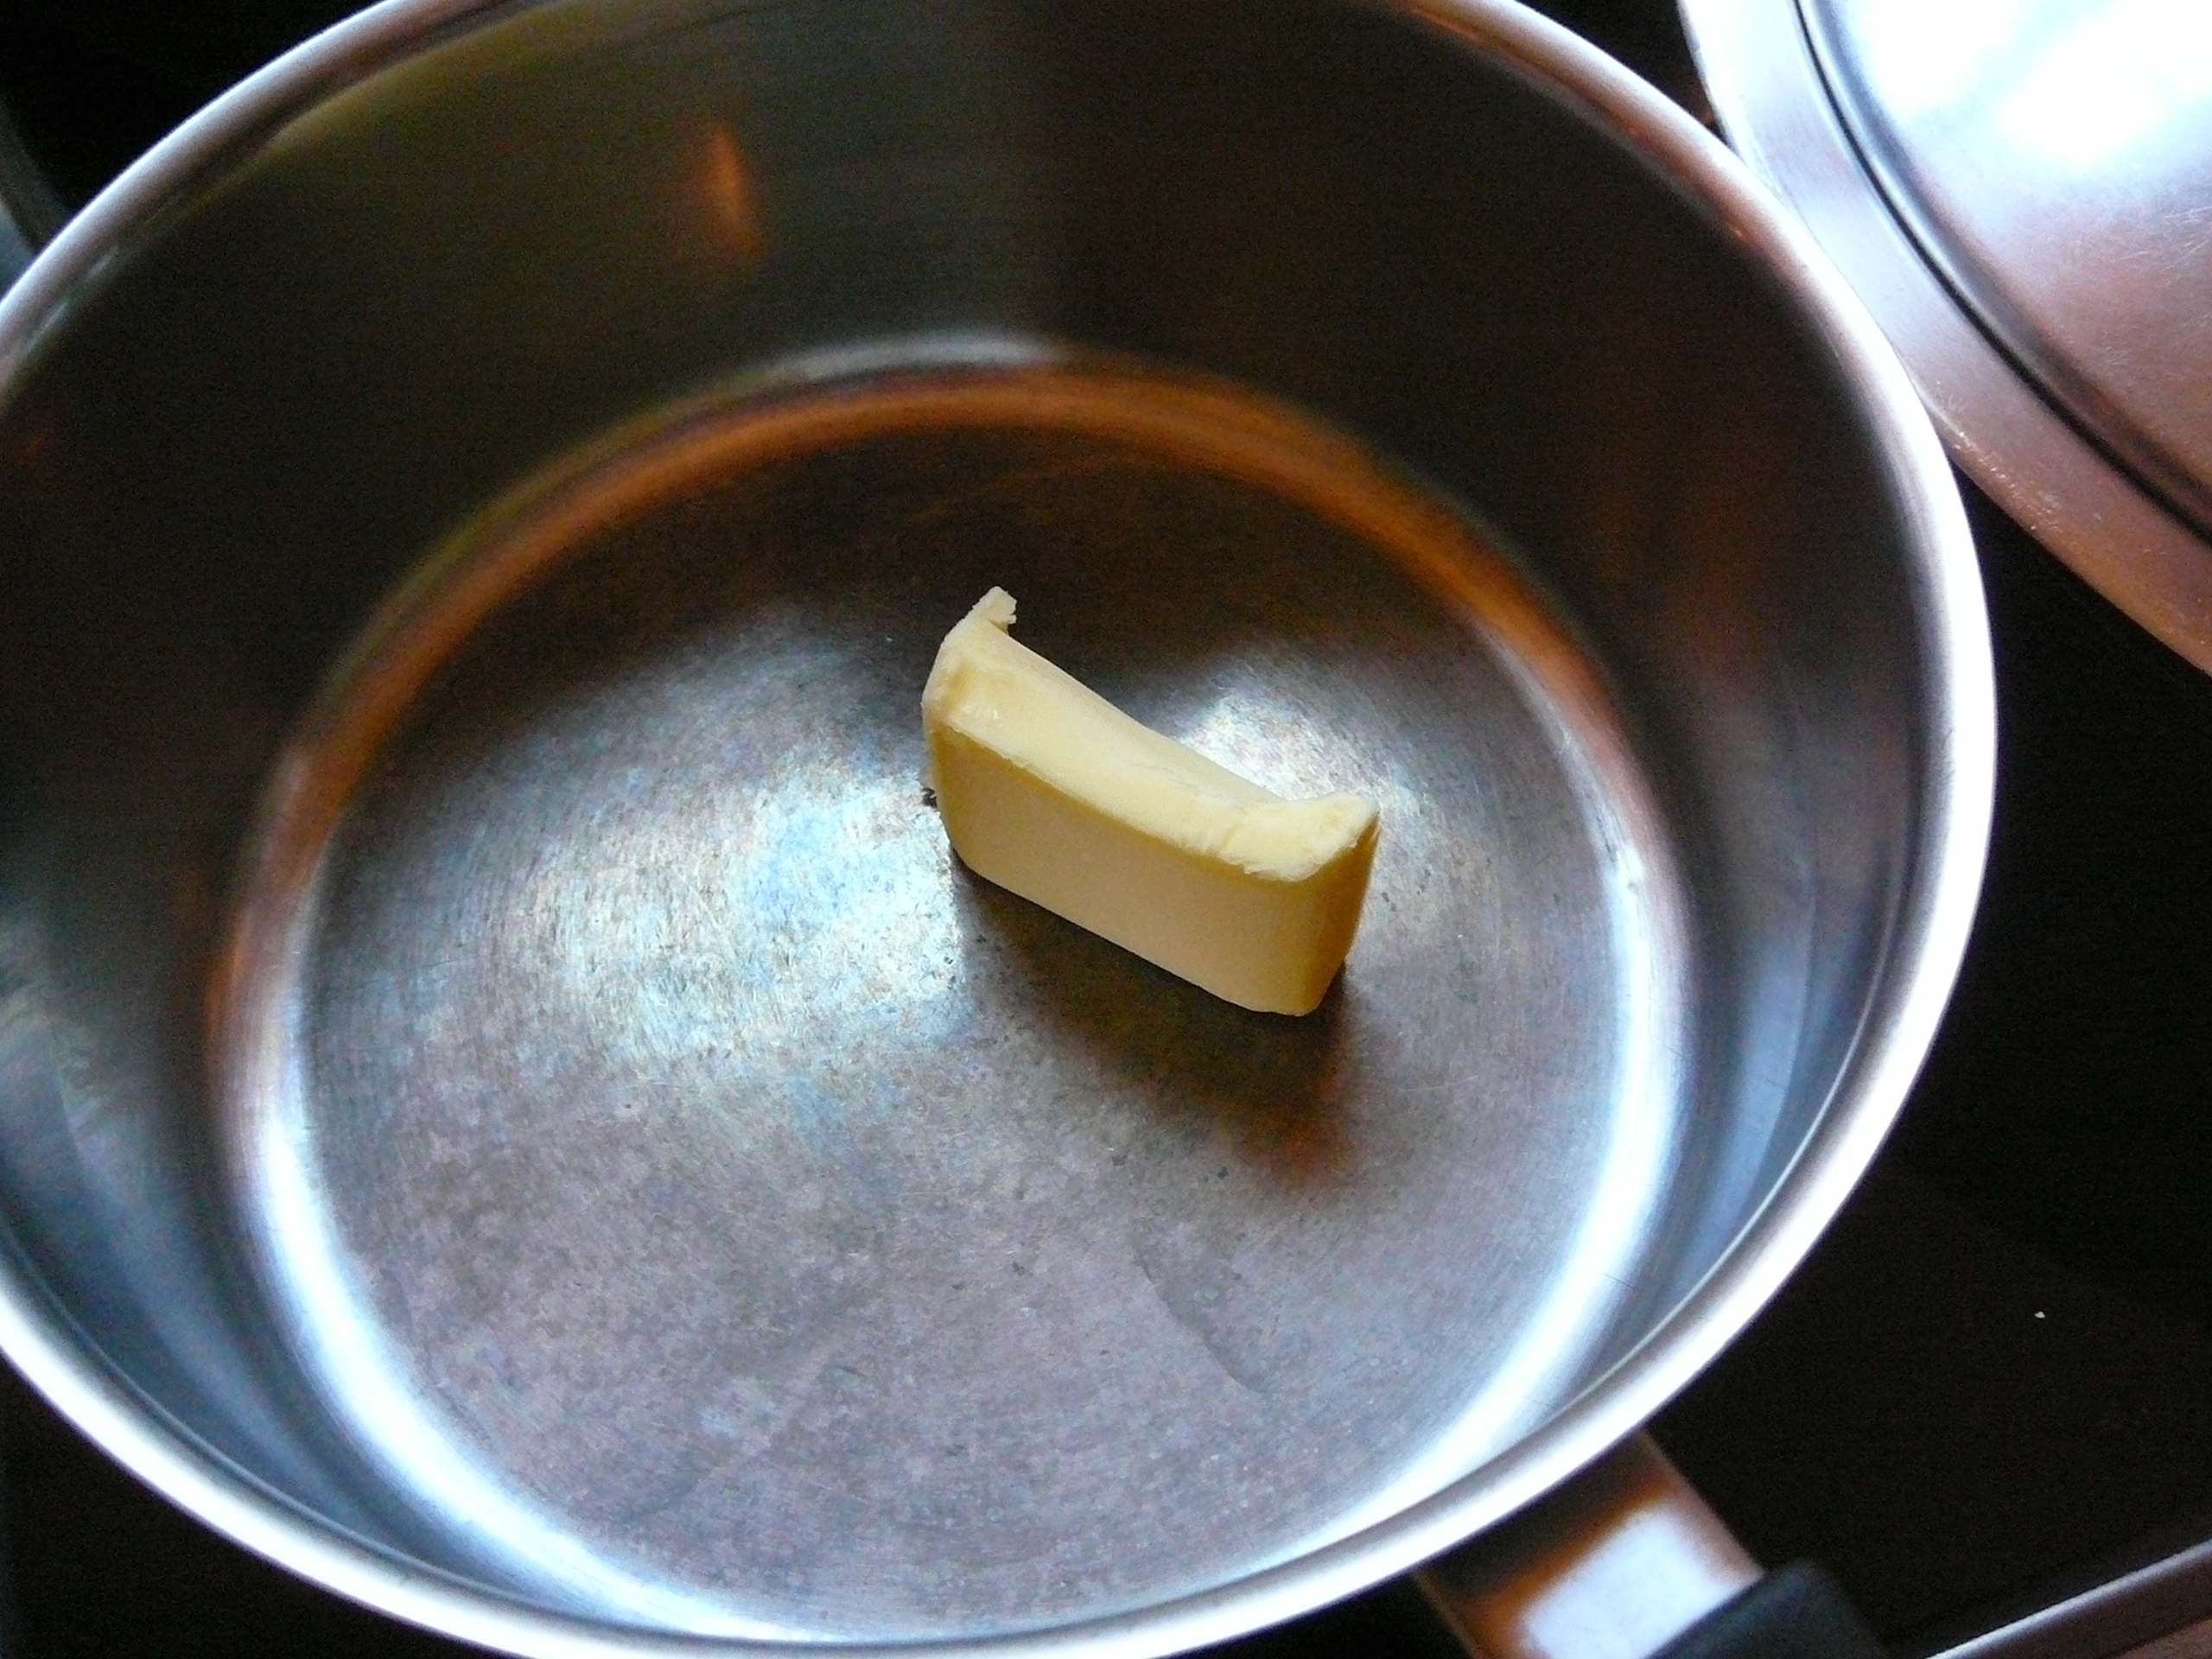
Unsalted butter, softened – 150grams

Egg yolks – 3

Icing sugar – 120grams

Vanilla bean 1,

Lemon fine zest of 1/2

Salt – pinch

Egg extra for brushing and sealing the tart case

Slice the vanilla bean down the length and carefully scape the seeds from each half out. Keep the pod and place it in your sugar pot to infuse.

Ingredients weighed up ready to go

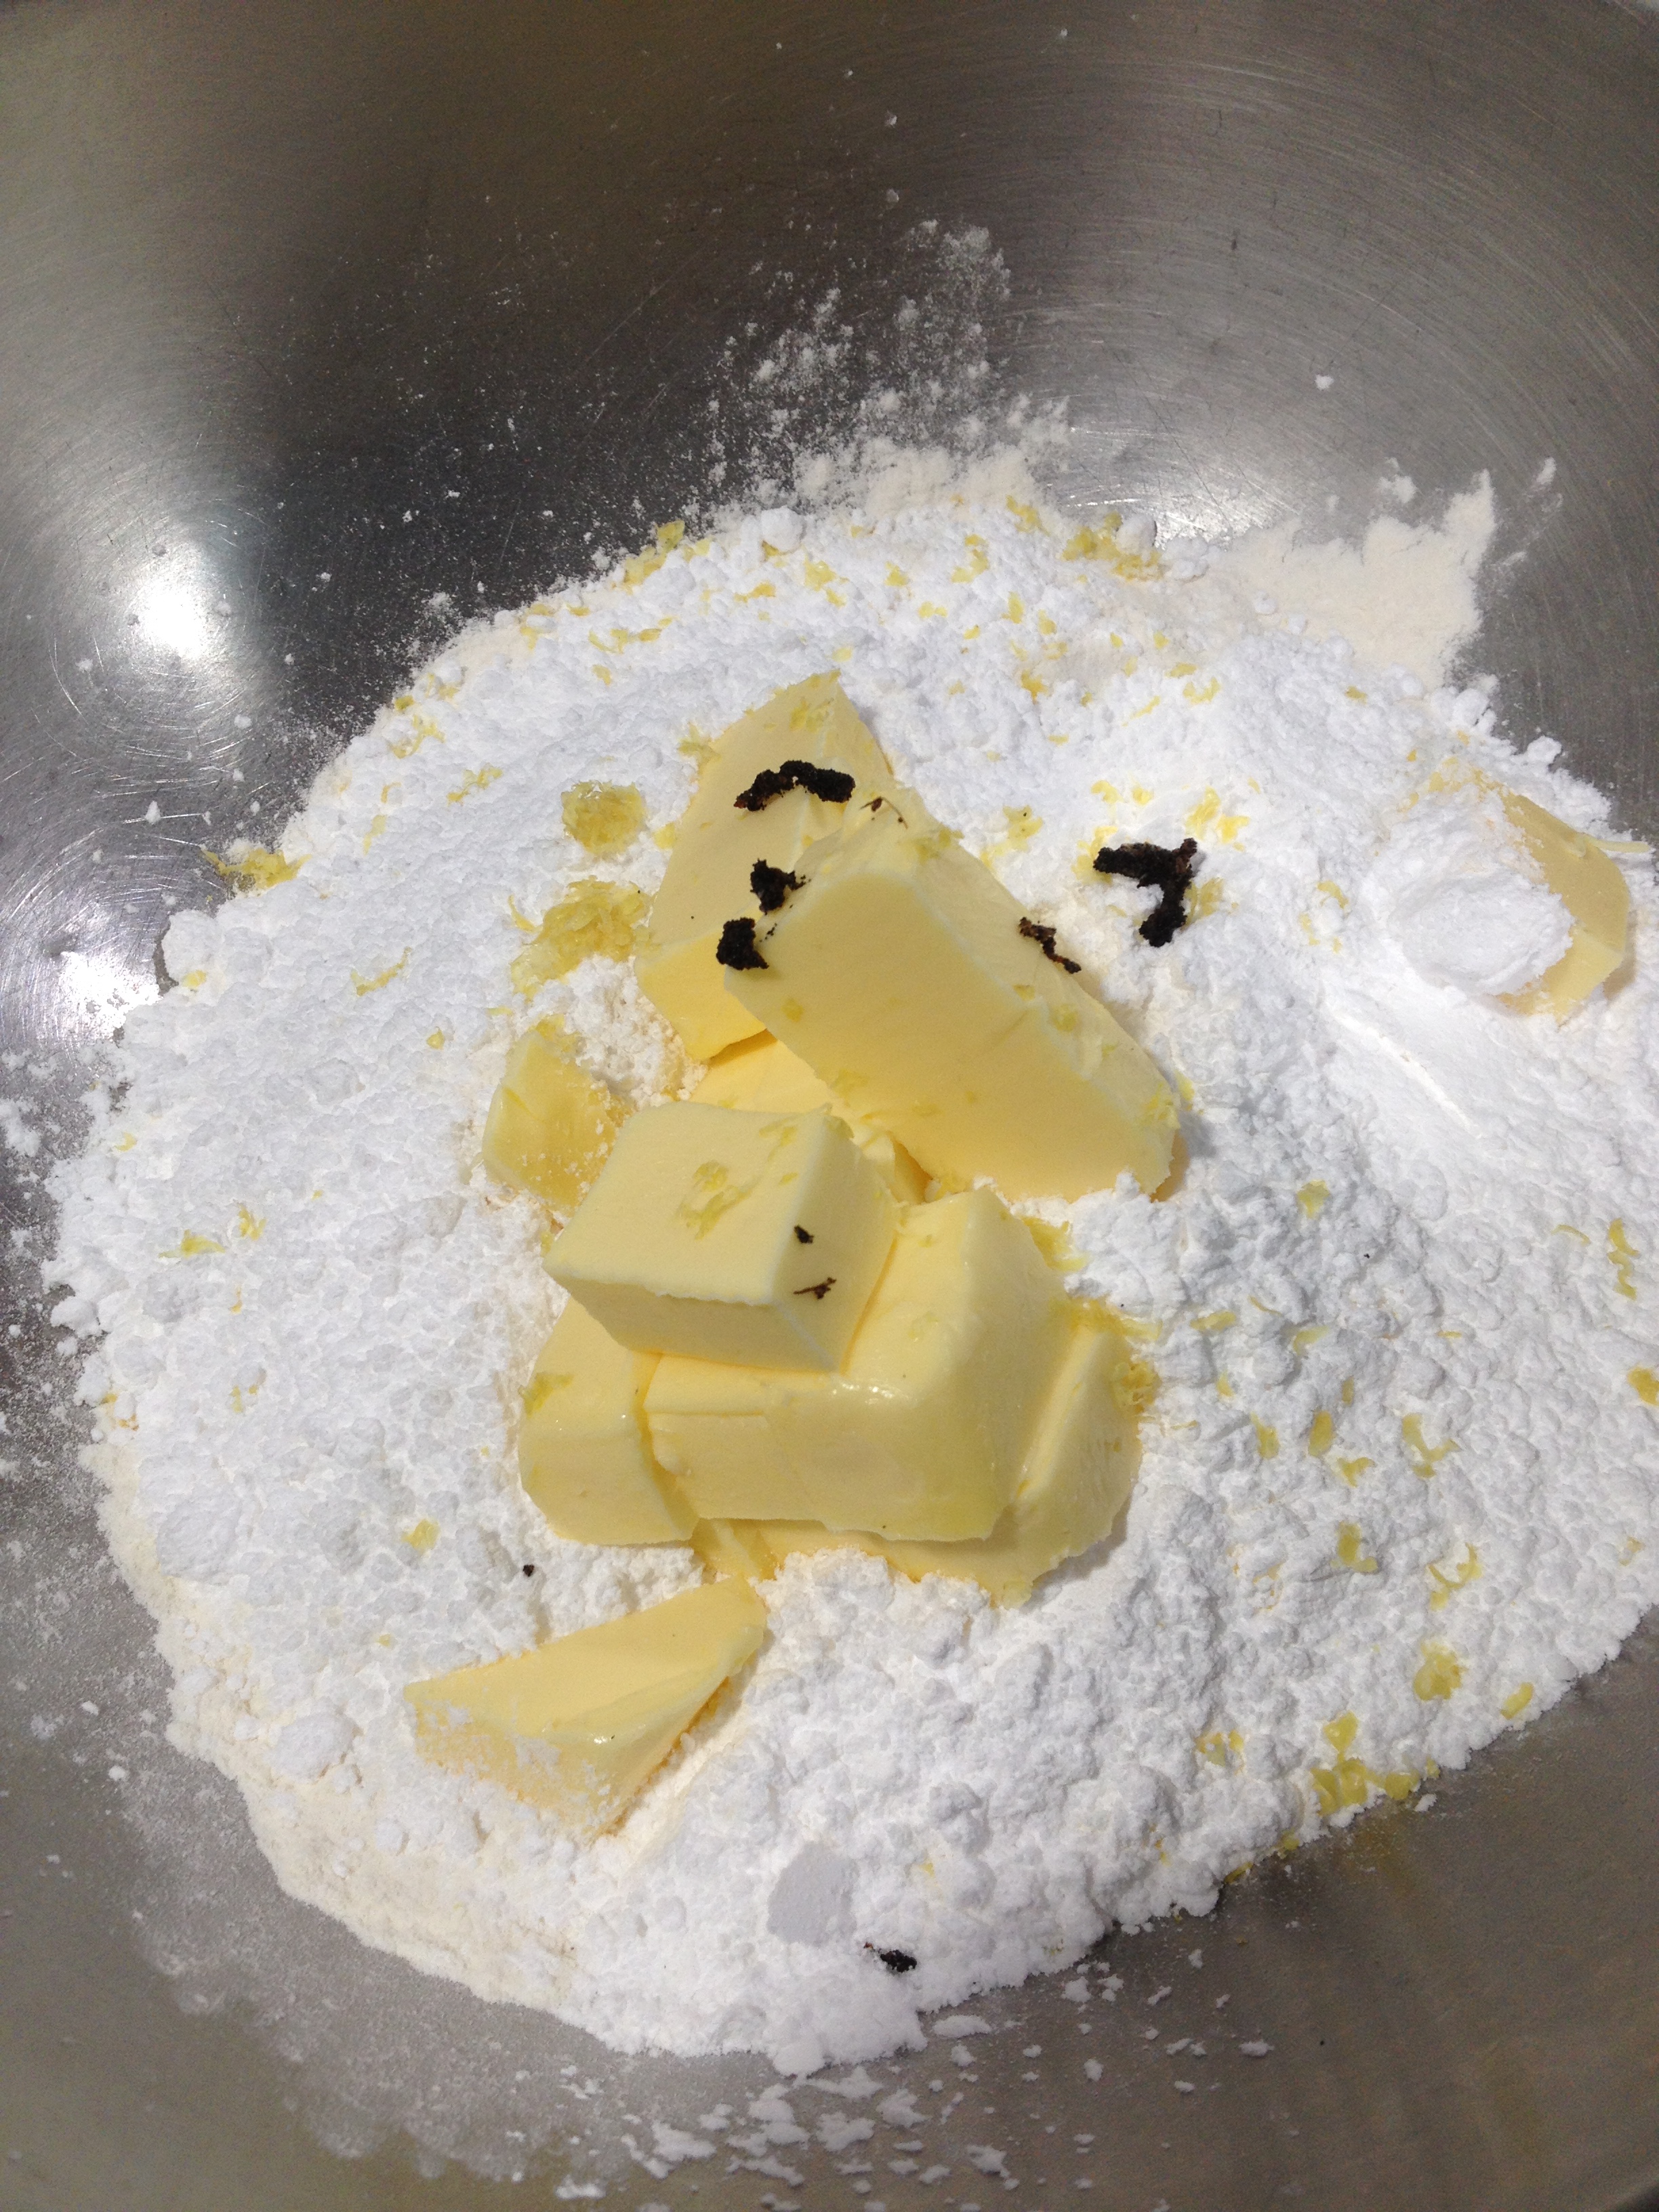
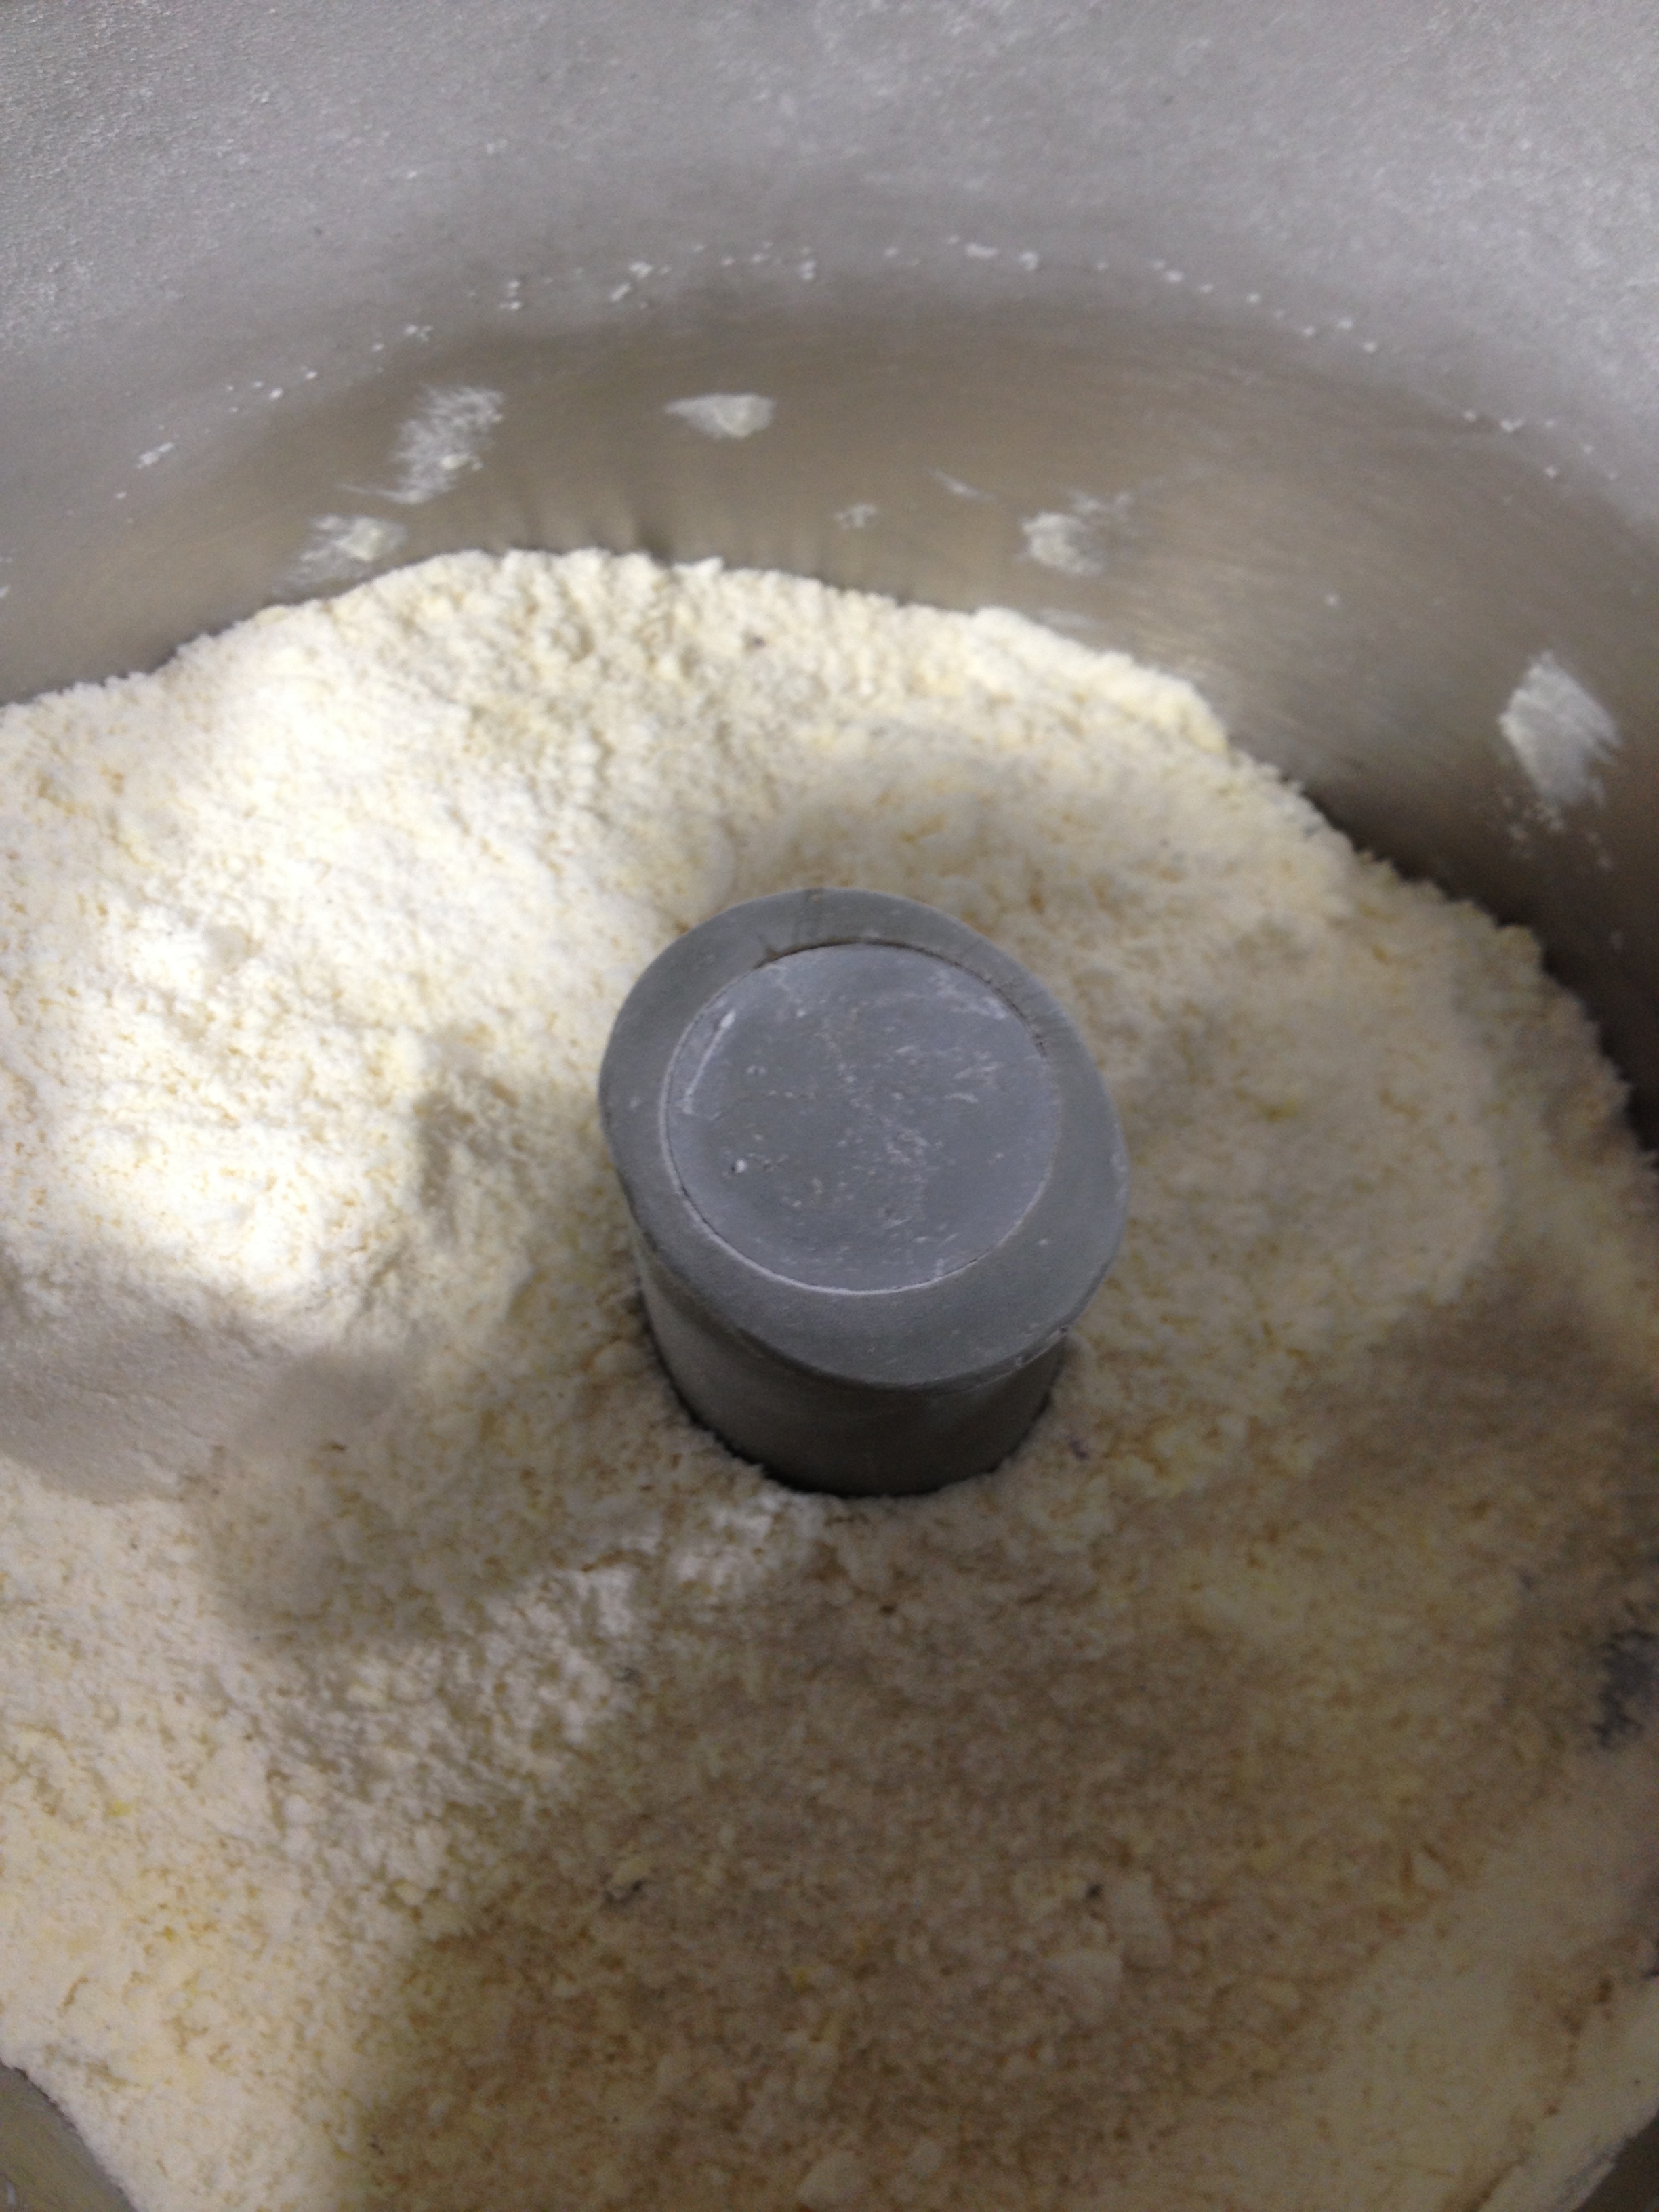
Place all ingredients except egg yolks in processor and blitz until mixture looks like sandy texture.

Sandy texture achieved

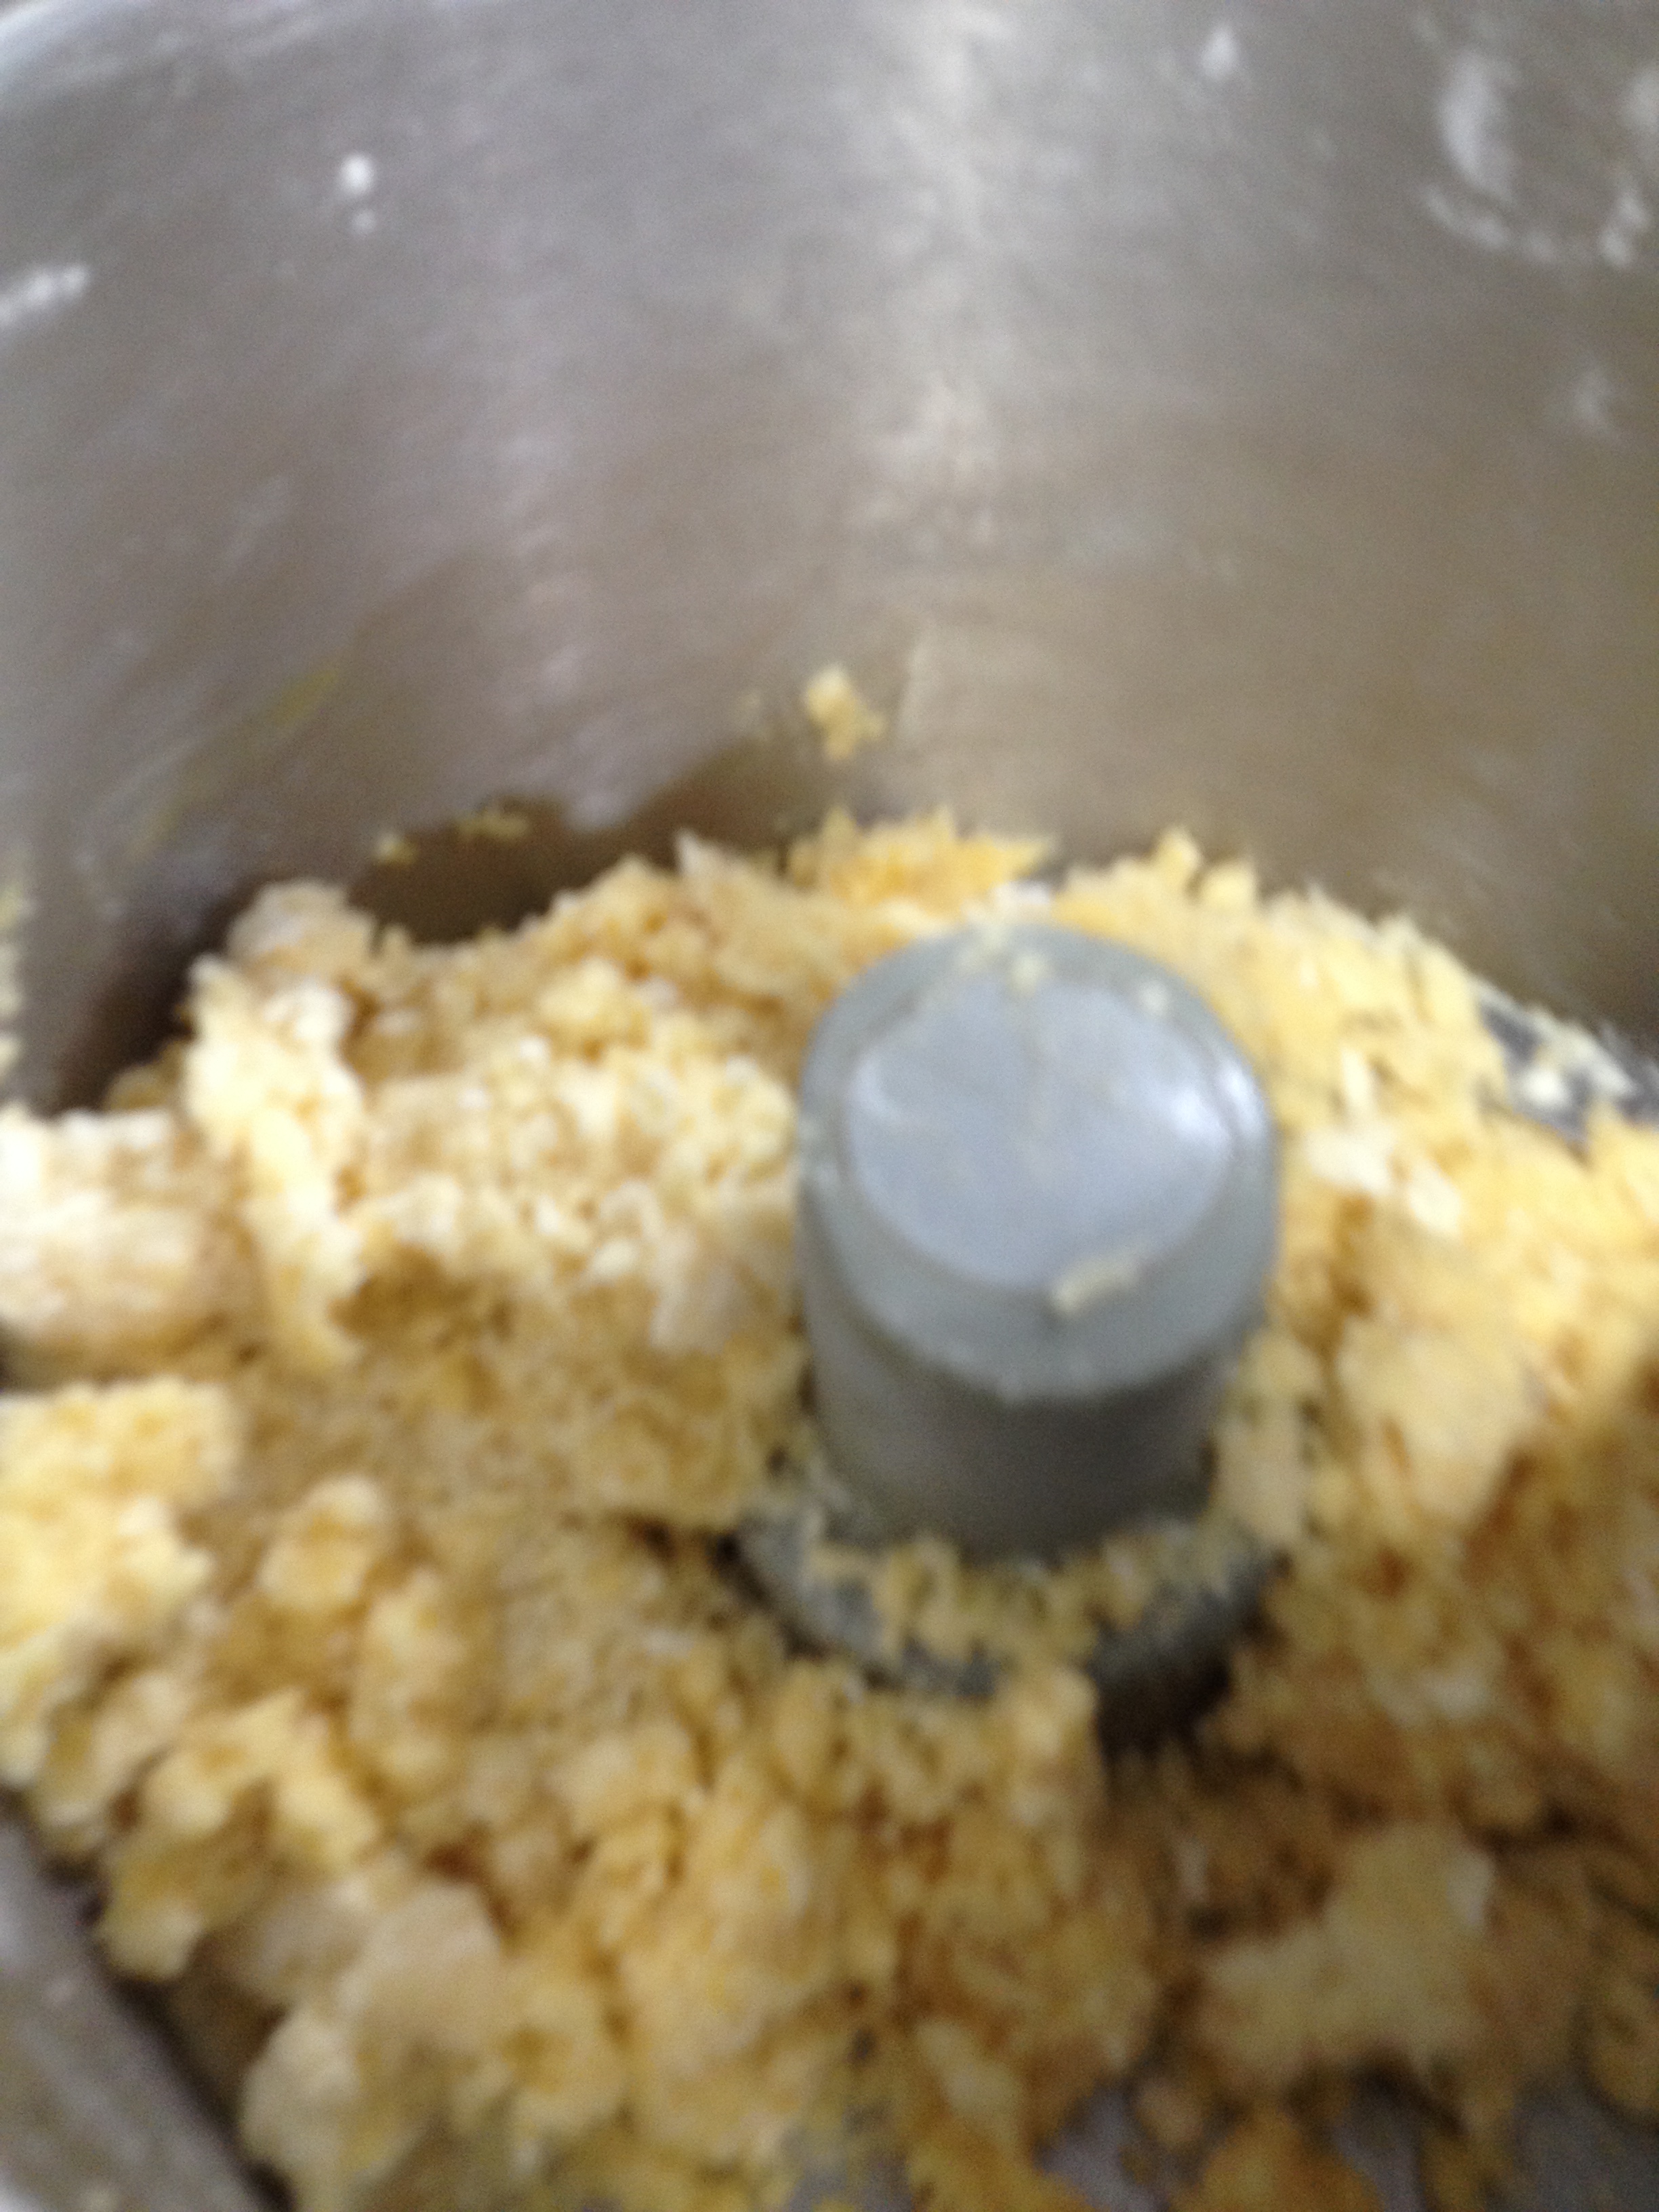
Slowly drop in the egg yolks one at a time. the mixture should come together and form a ball.

Adding the egg yolks

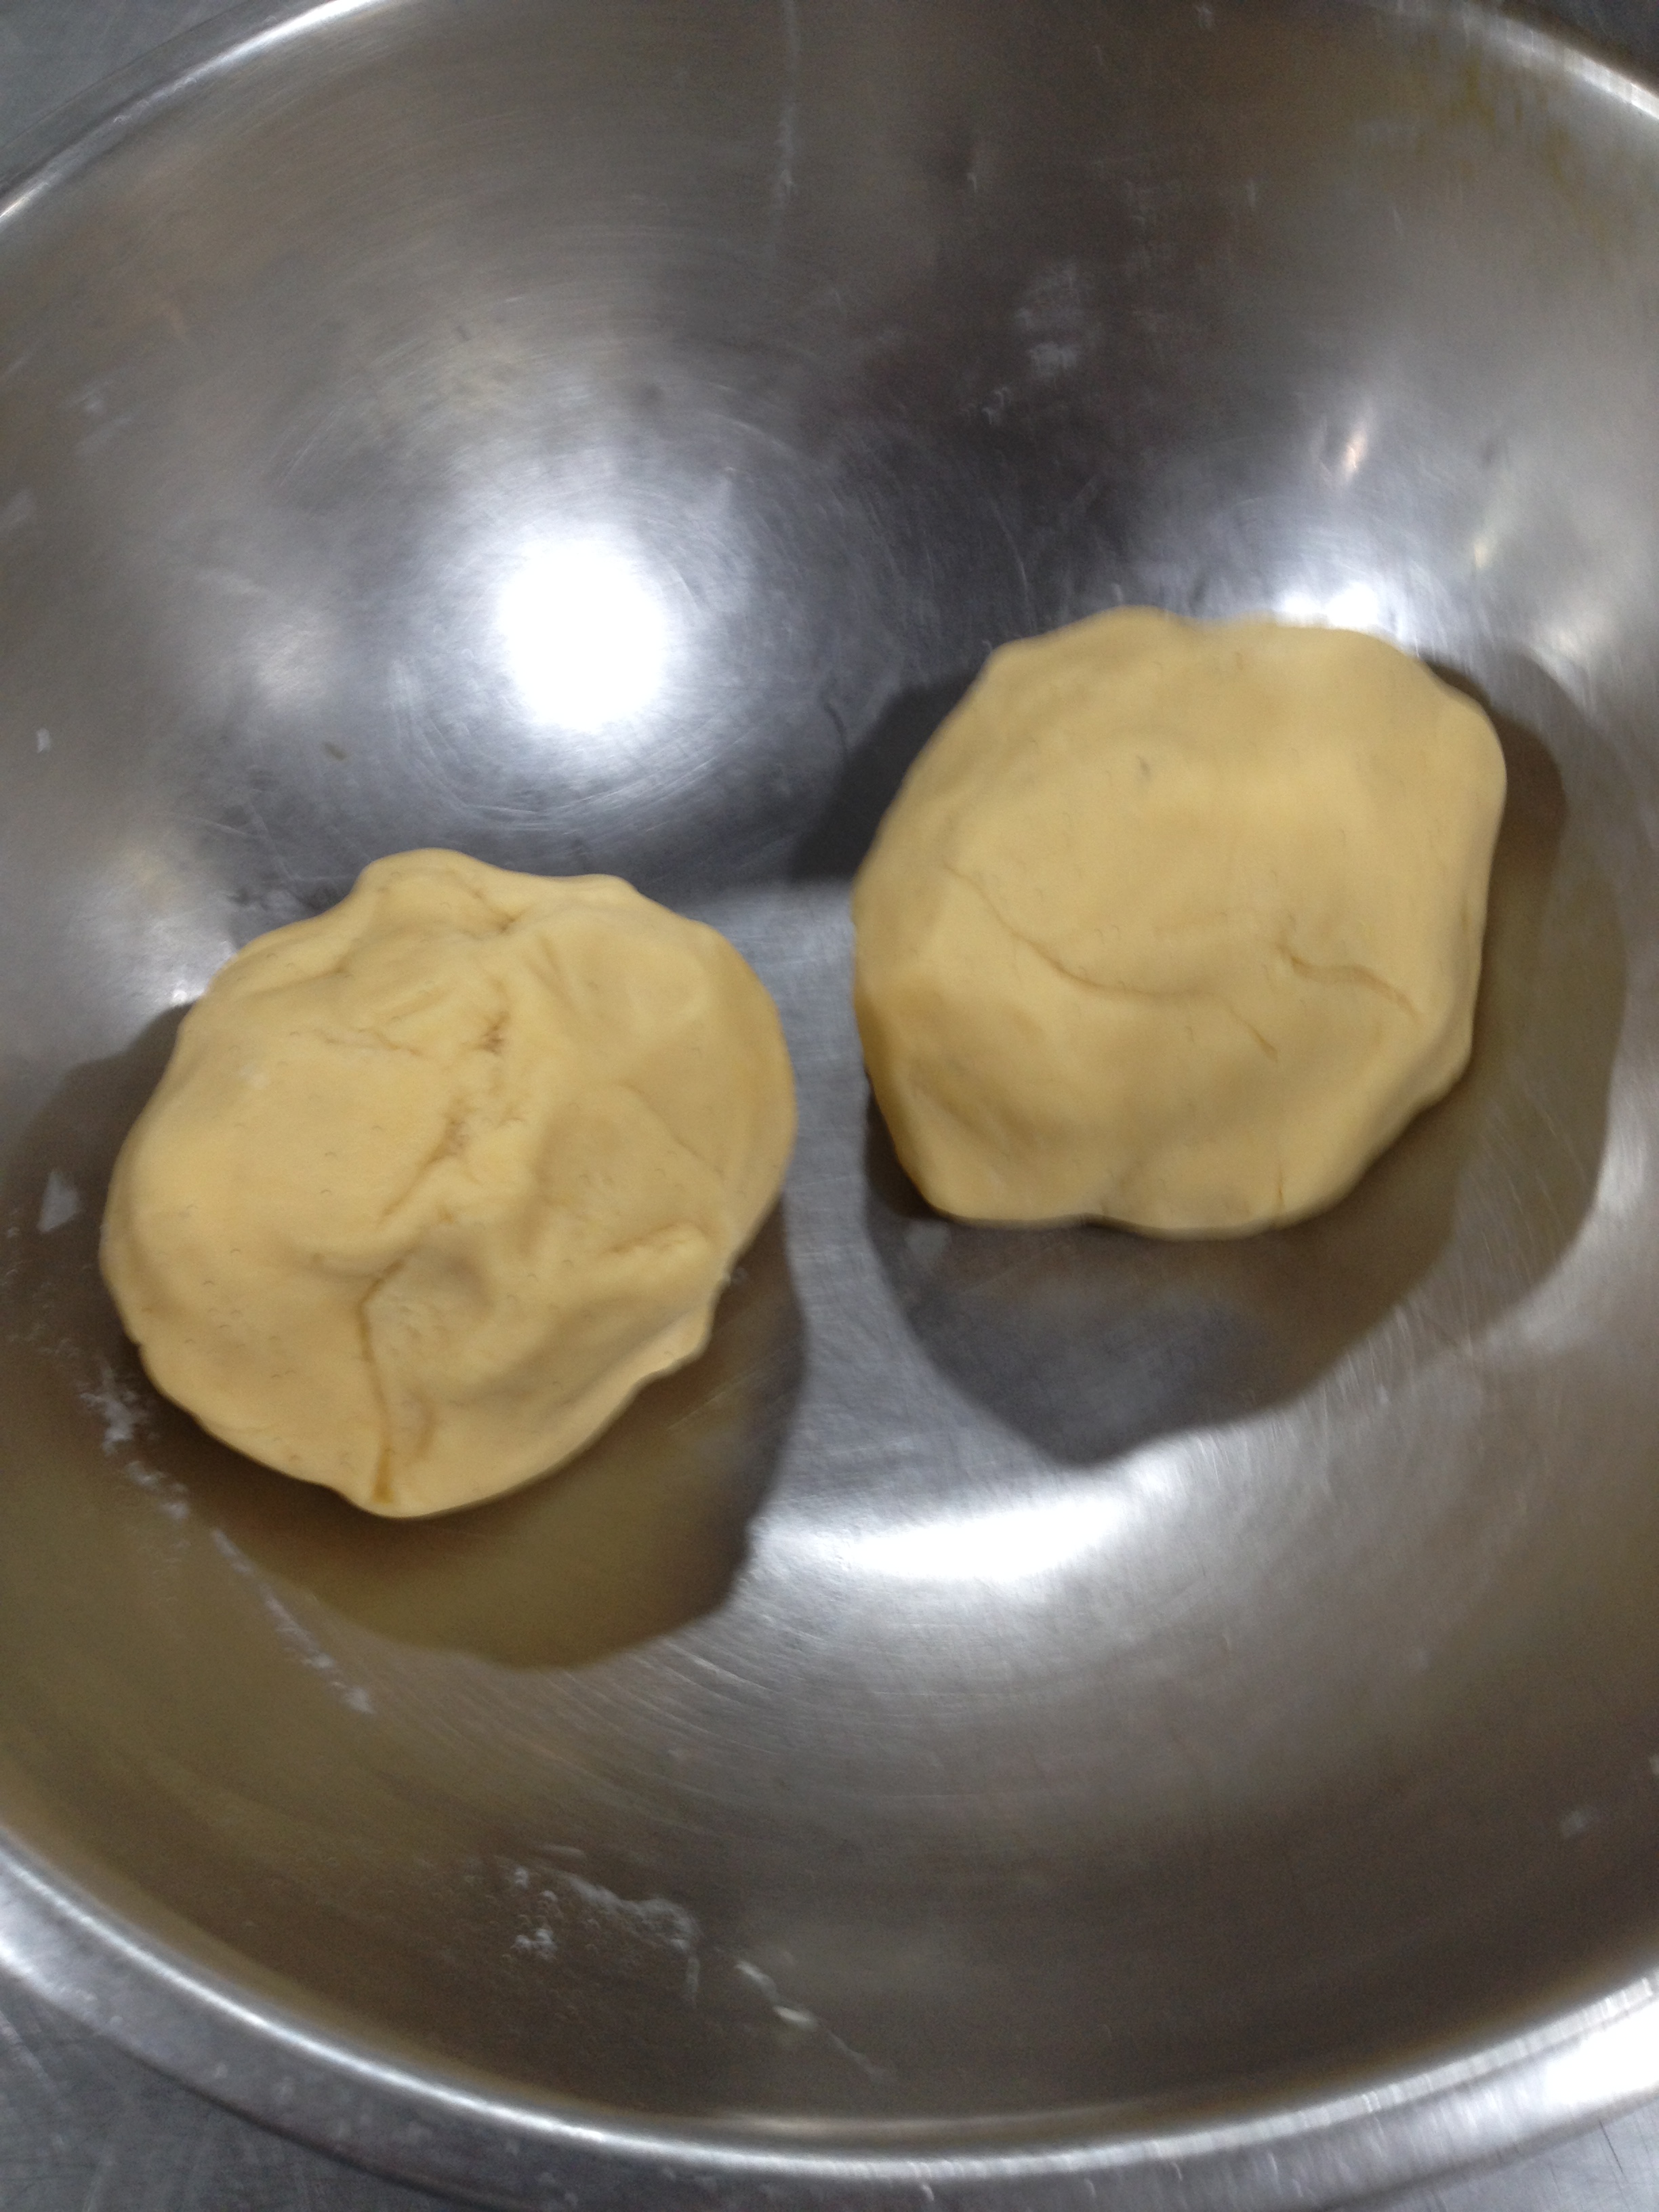
Turn machine off and remove the pastry.

Almost there, a little bit of a squeeze together and all is good

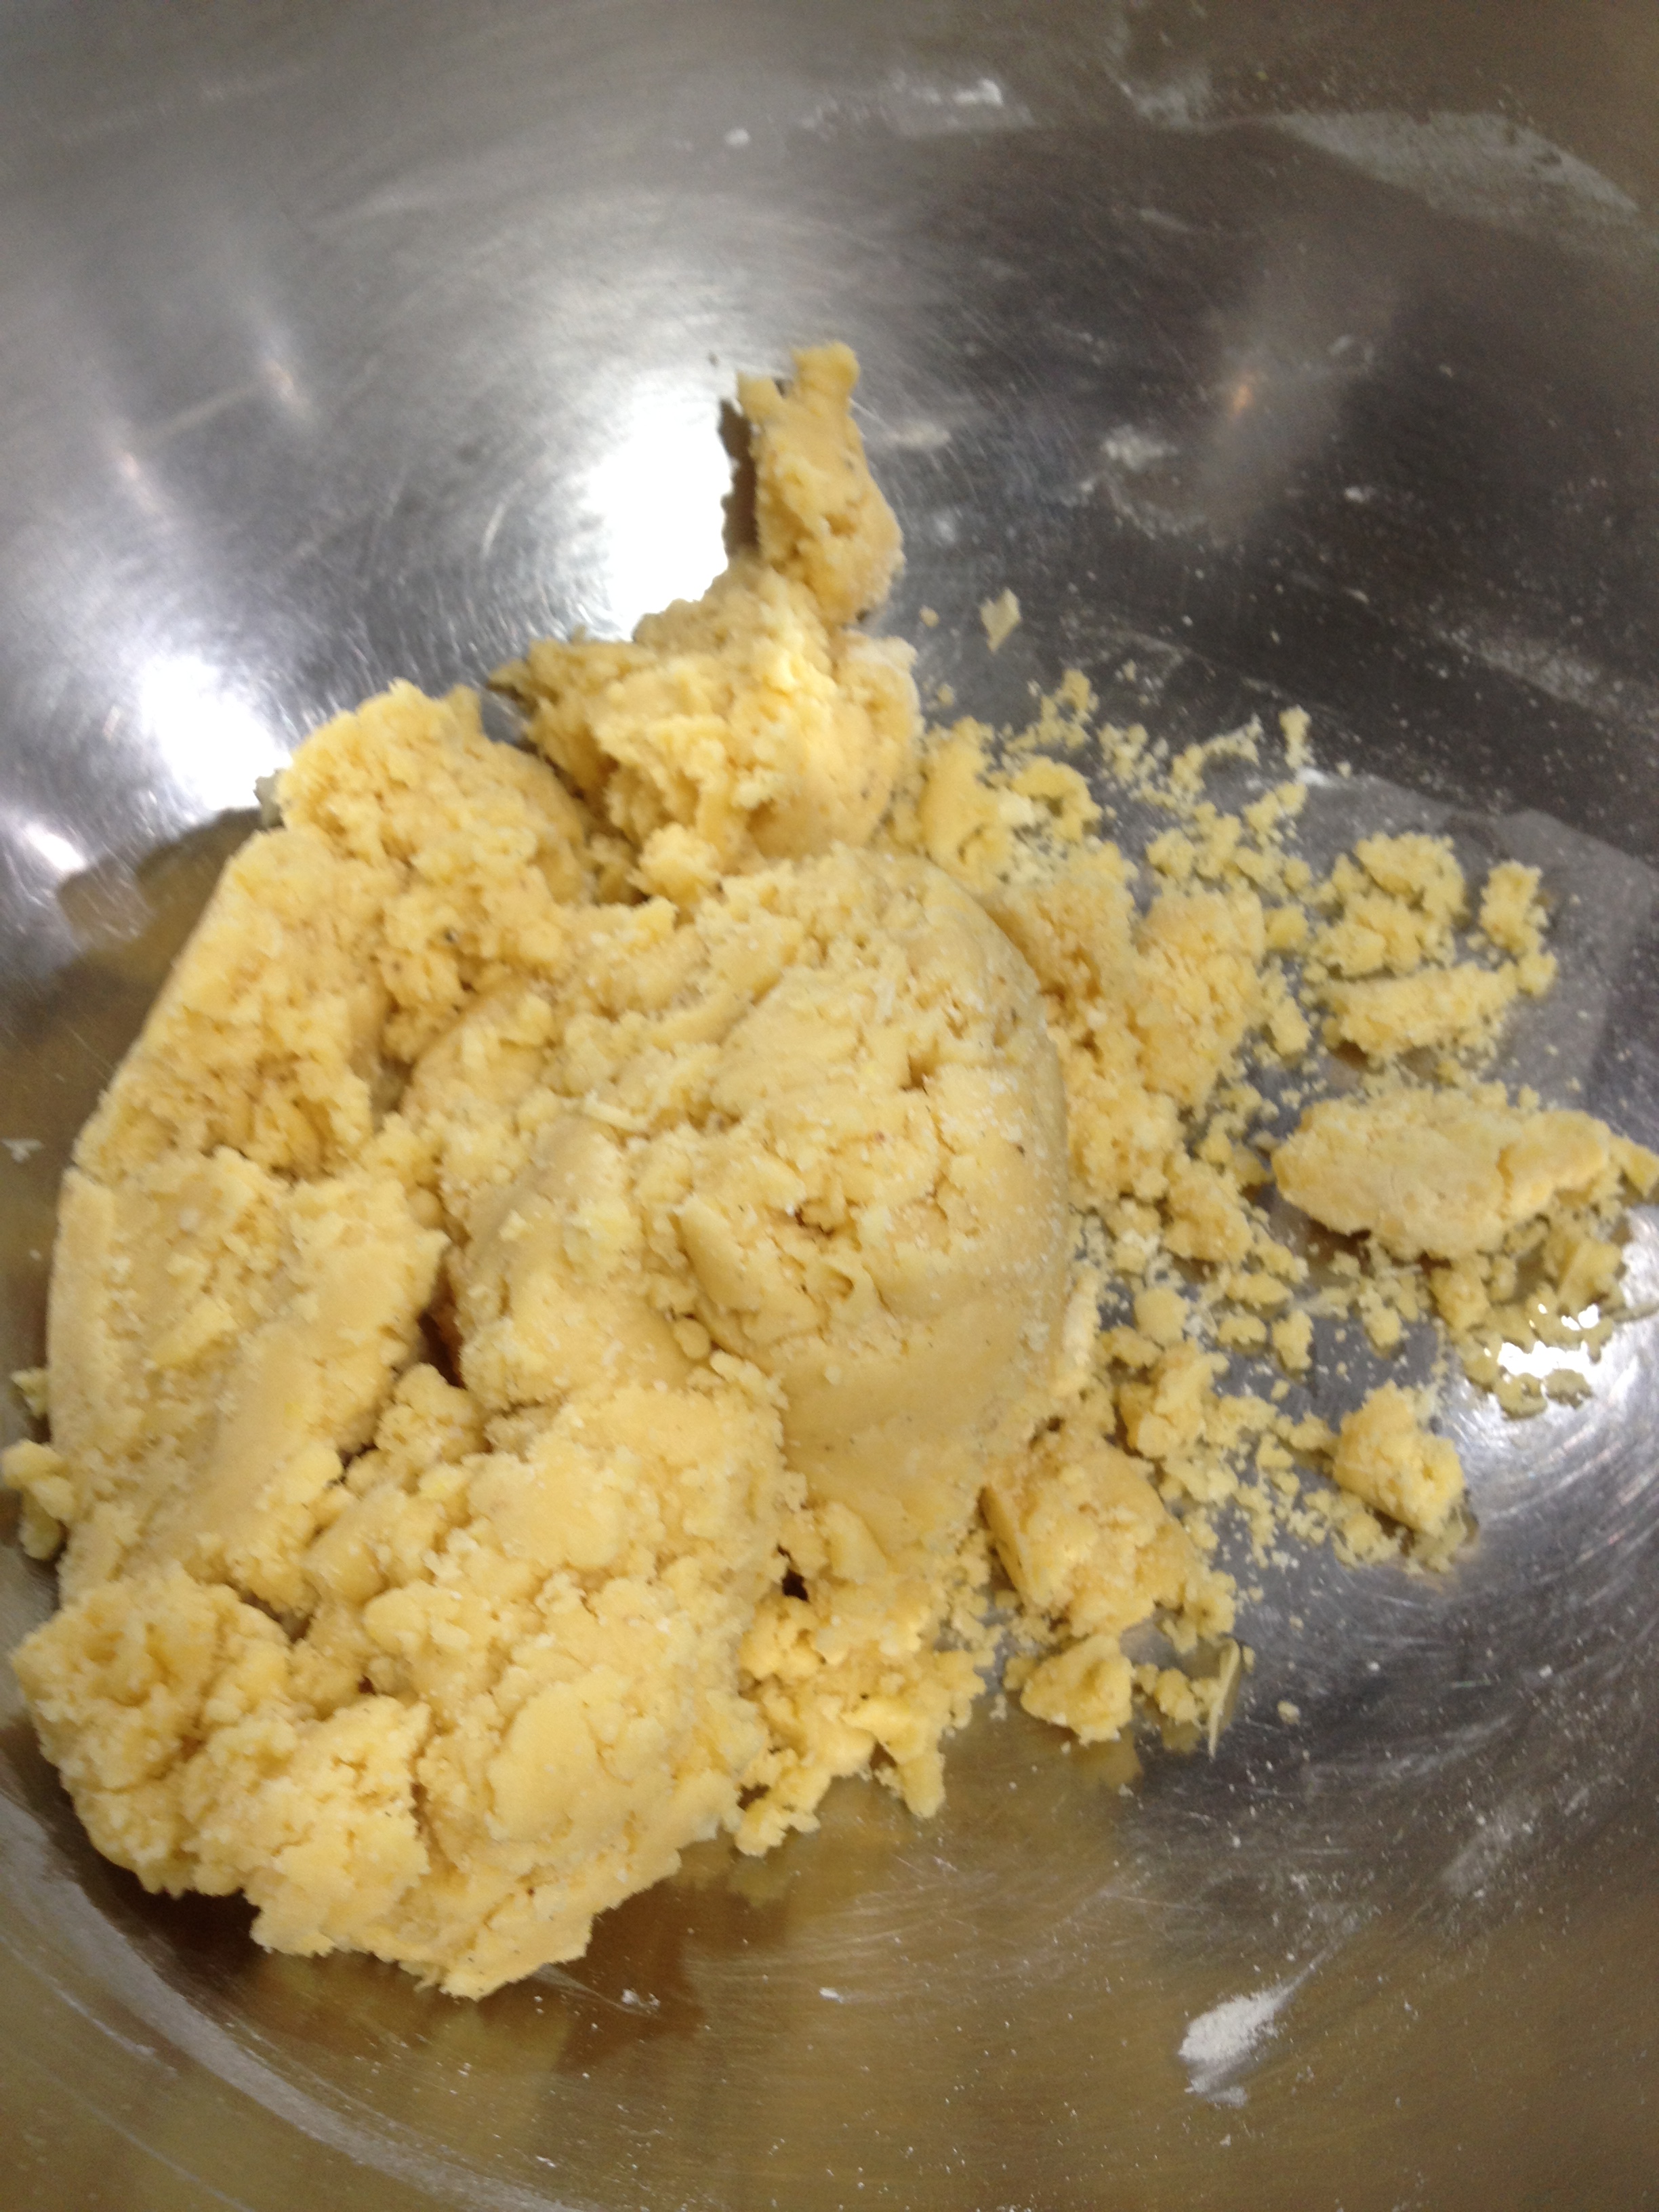
Weigh pastry and divide in to two balls, place on cling film and press down to a circle, wrap completely. Place 1 piece in refrigerator for an hour and freeze the other for future use.

Dividing up, one for now one for next time

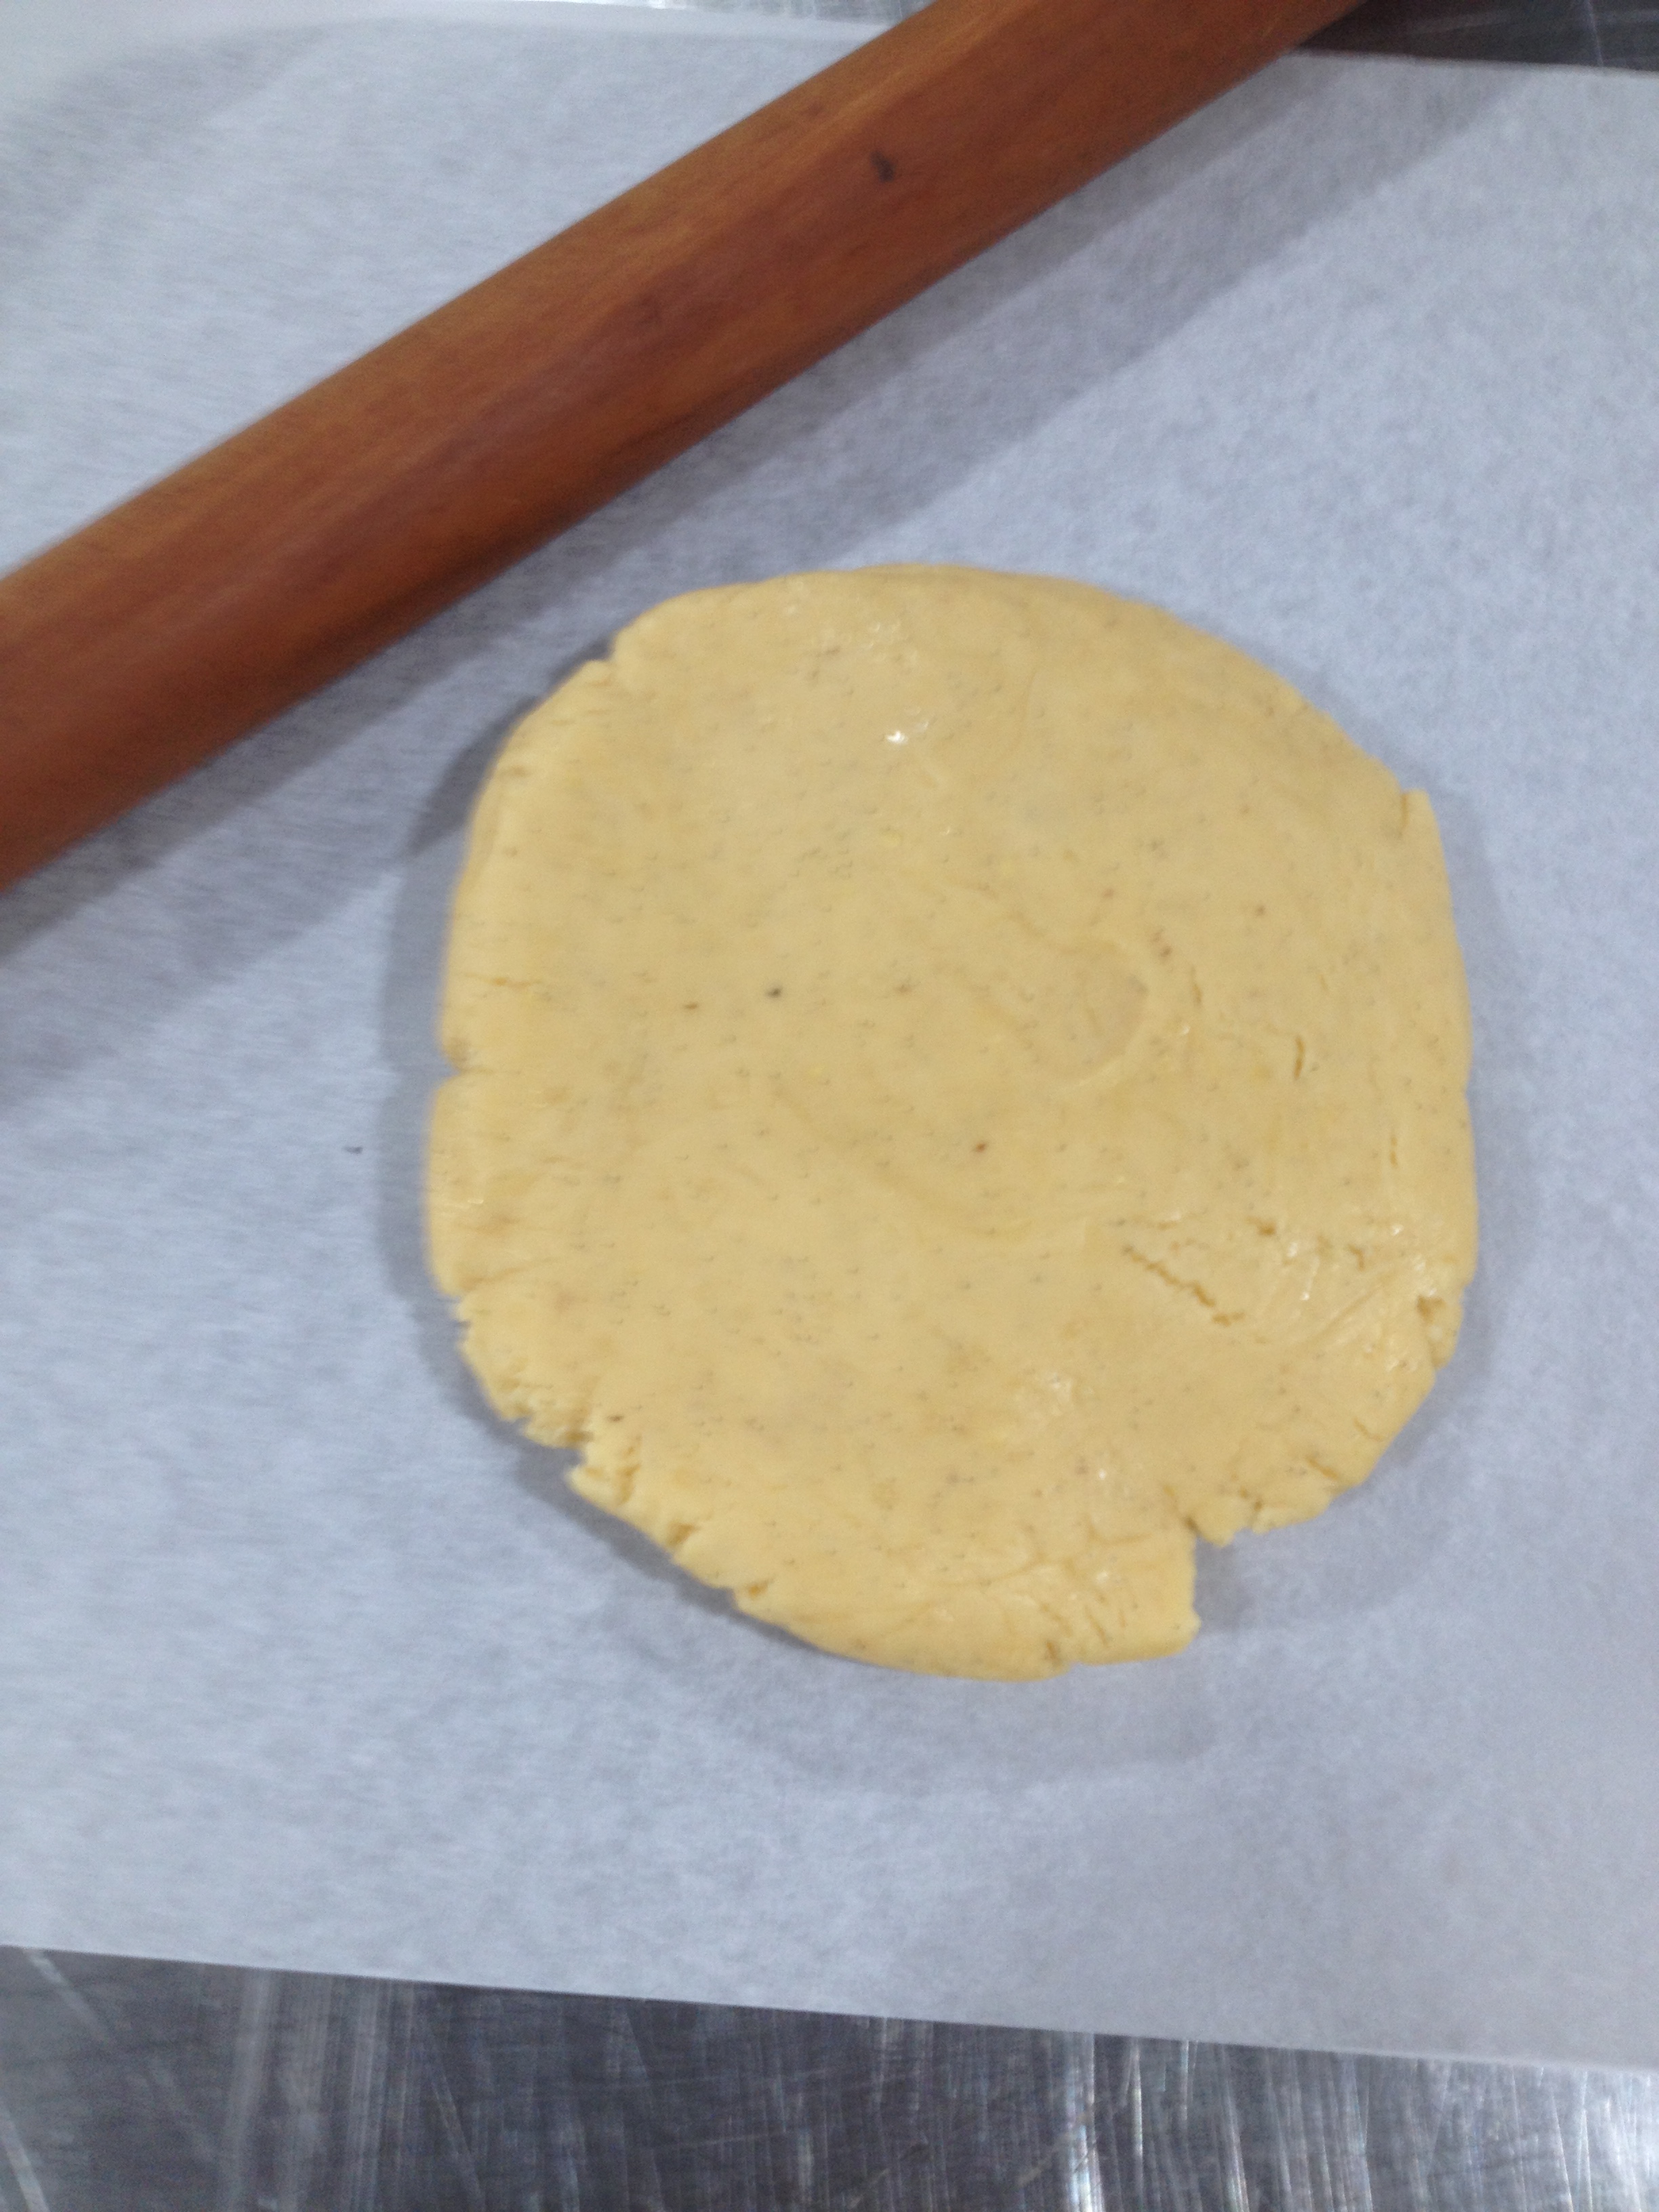
Remove pastry from refrigerator, place on to a piece of gladbake/silicon paper, allow to soften slightly and then roll to 3mm thick.

Ready to roll
Ready to roll

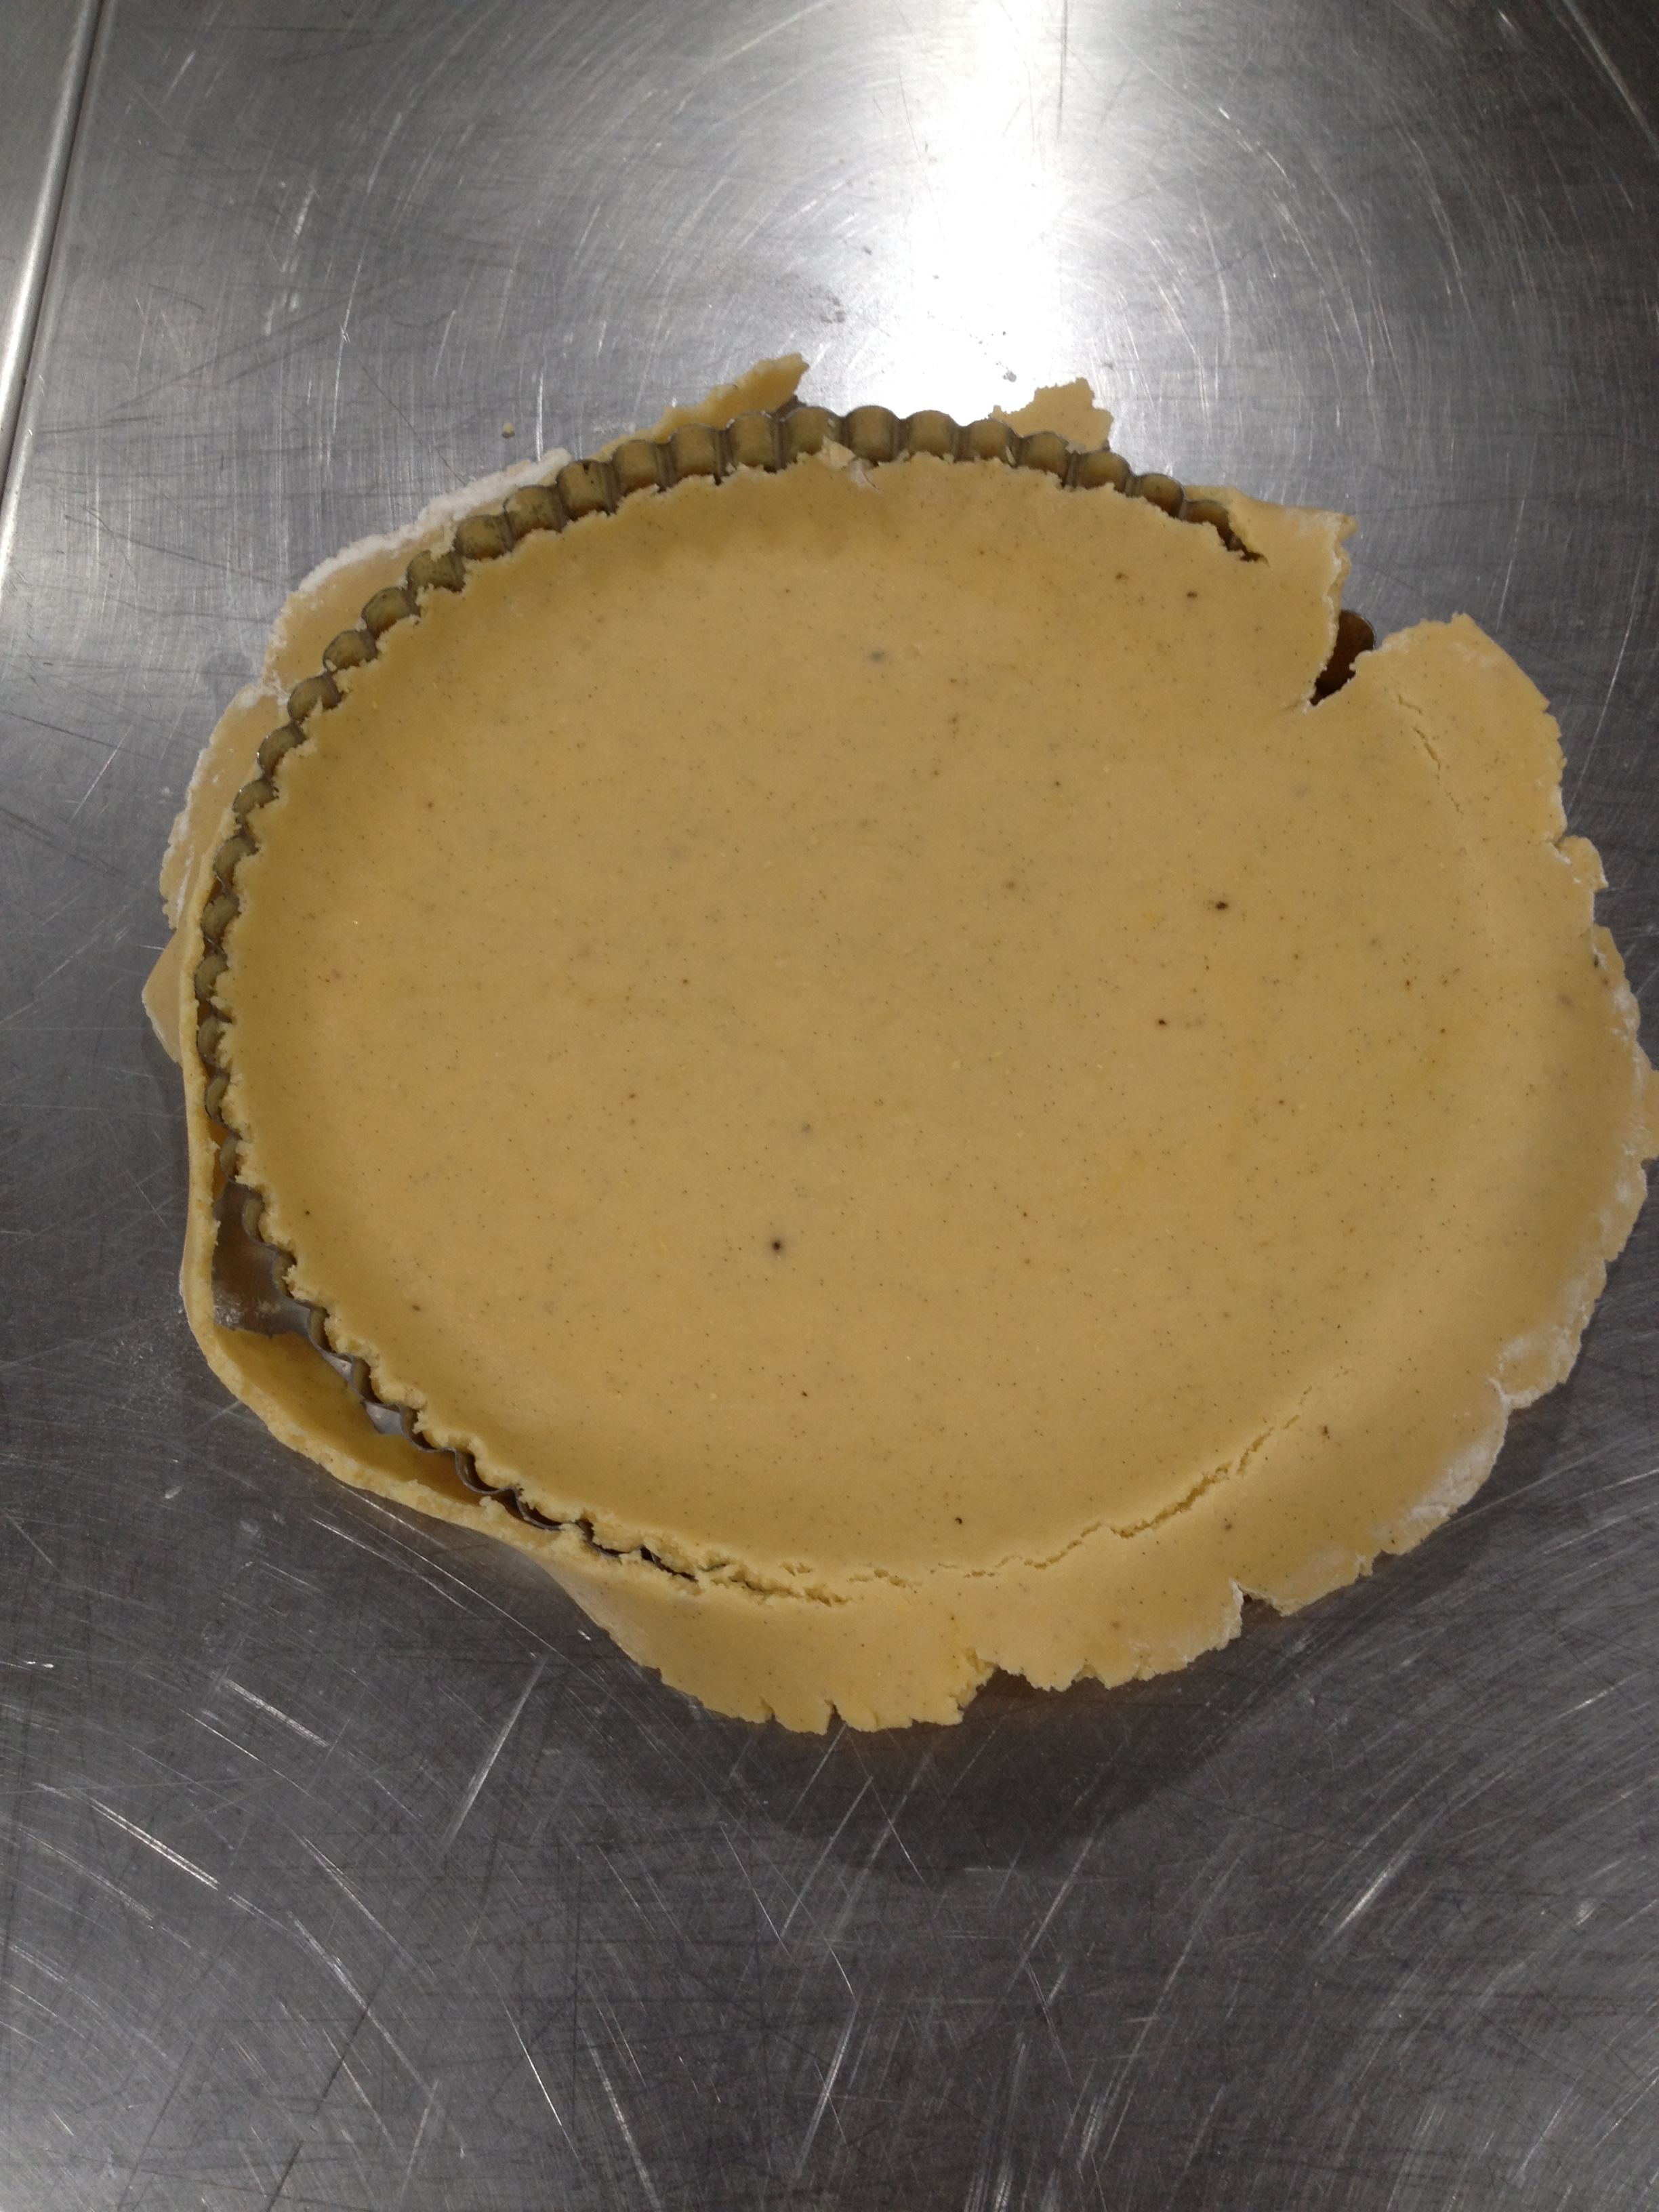
Spray a loose bottomed flan tin with oil spray and being careful pick up the paper and turn the pastry over and in to the flan tin. It will break a bit but you can press the gaps together and fill in any spaces with the pastry that breaks off. Grab a fork and prick the base all over.

Breakups can be messy but you can patch things up
Breakups can be messy but most times you can patch things up
Pastry ready to
Pastry ready to

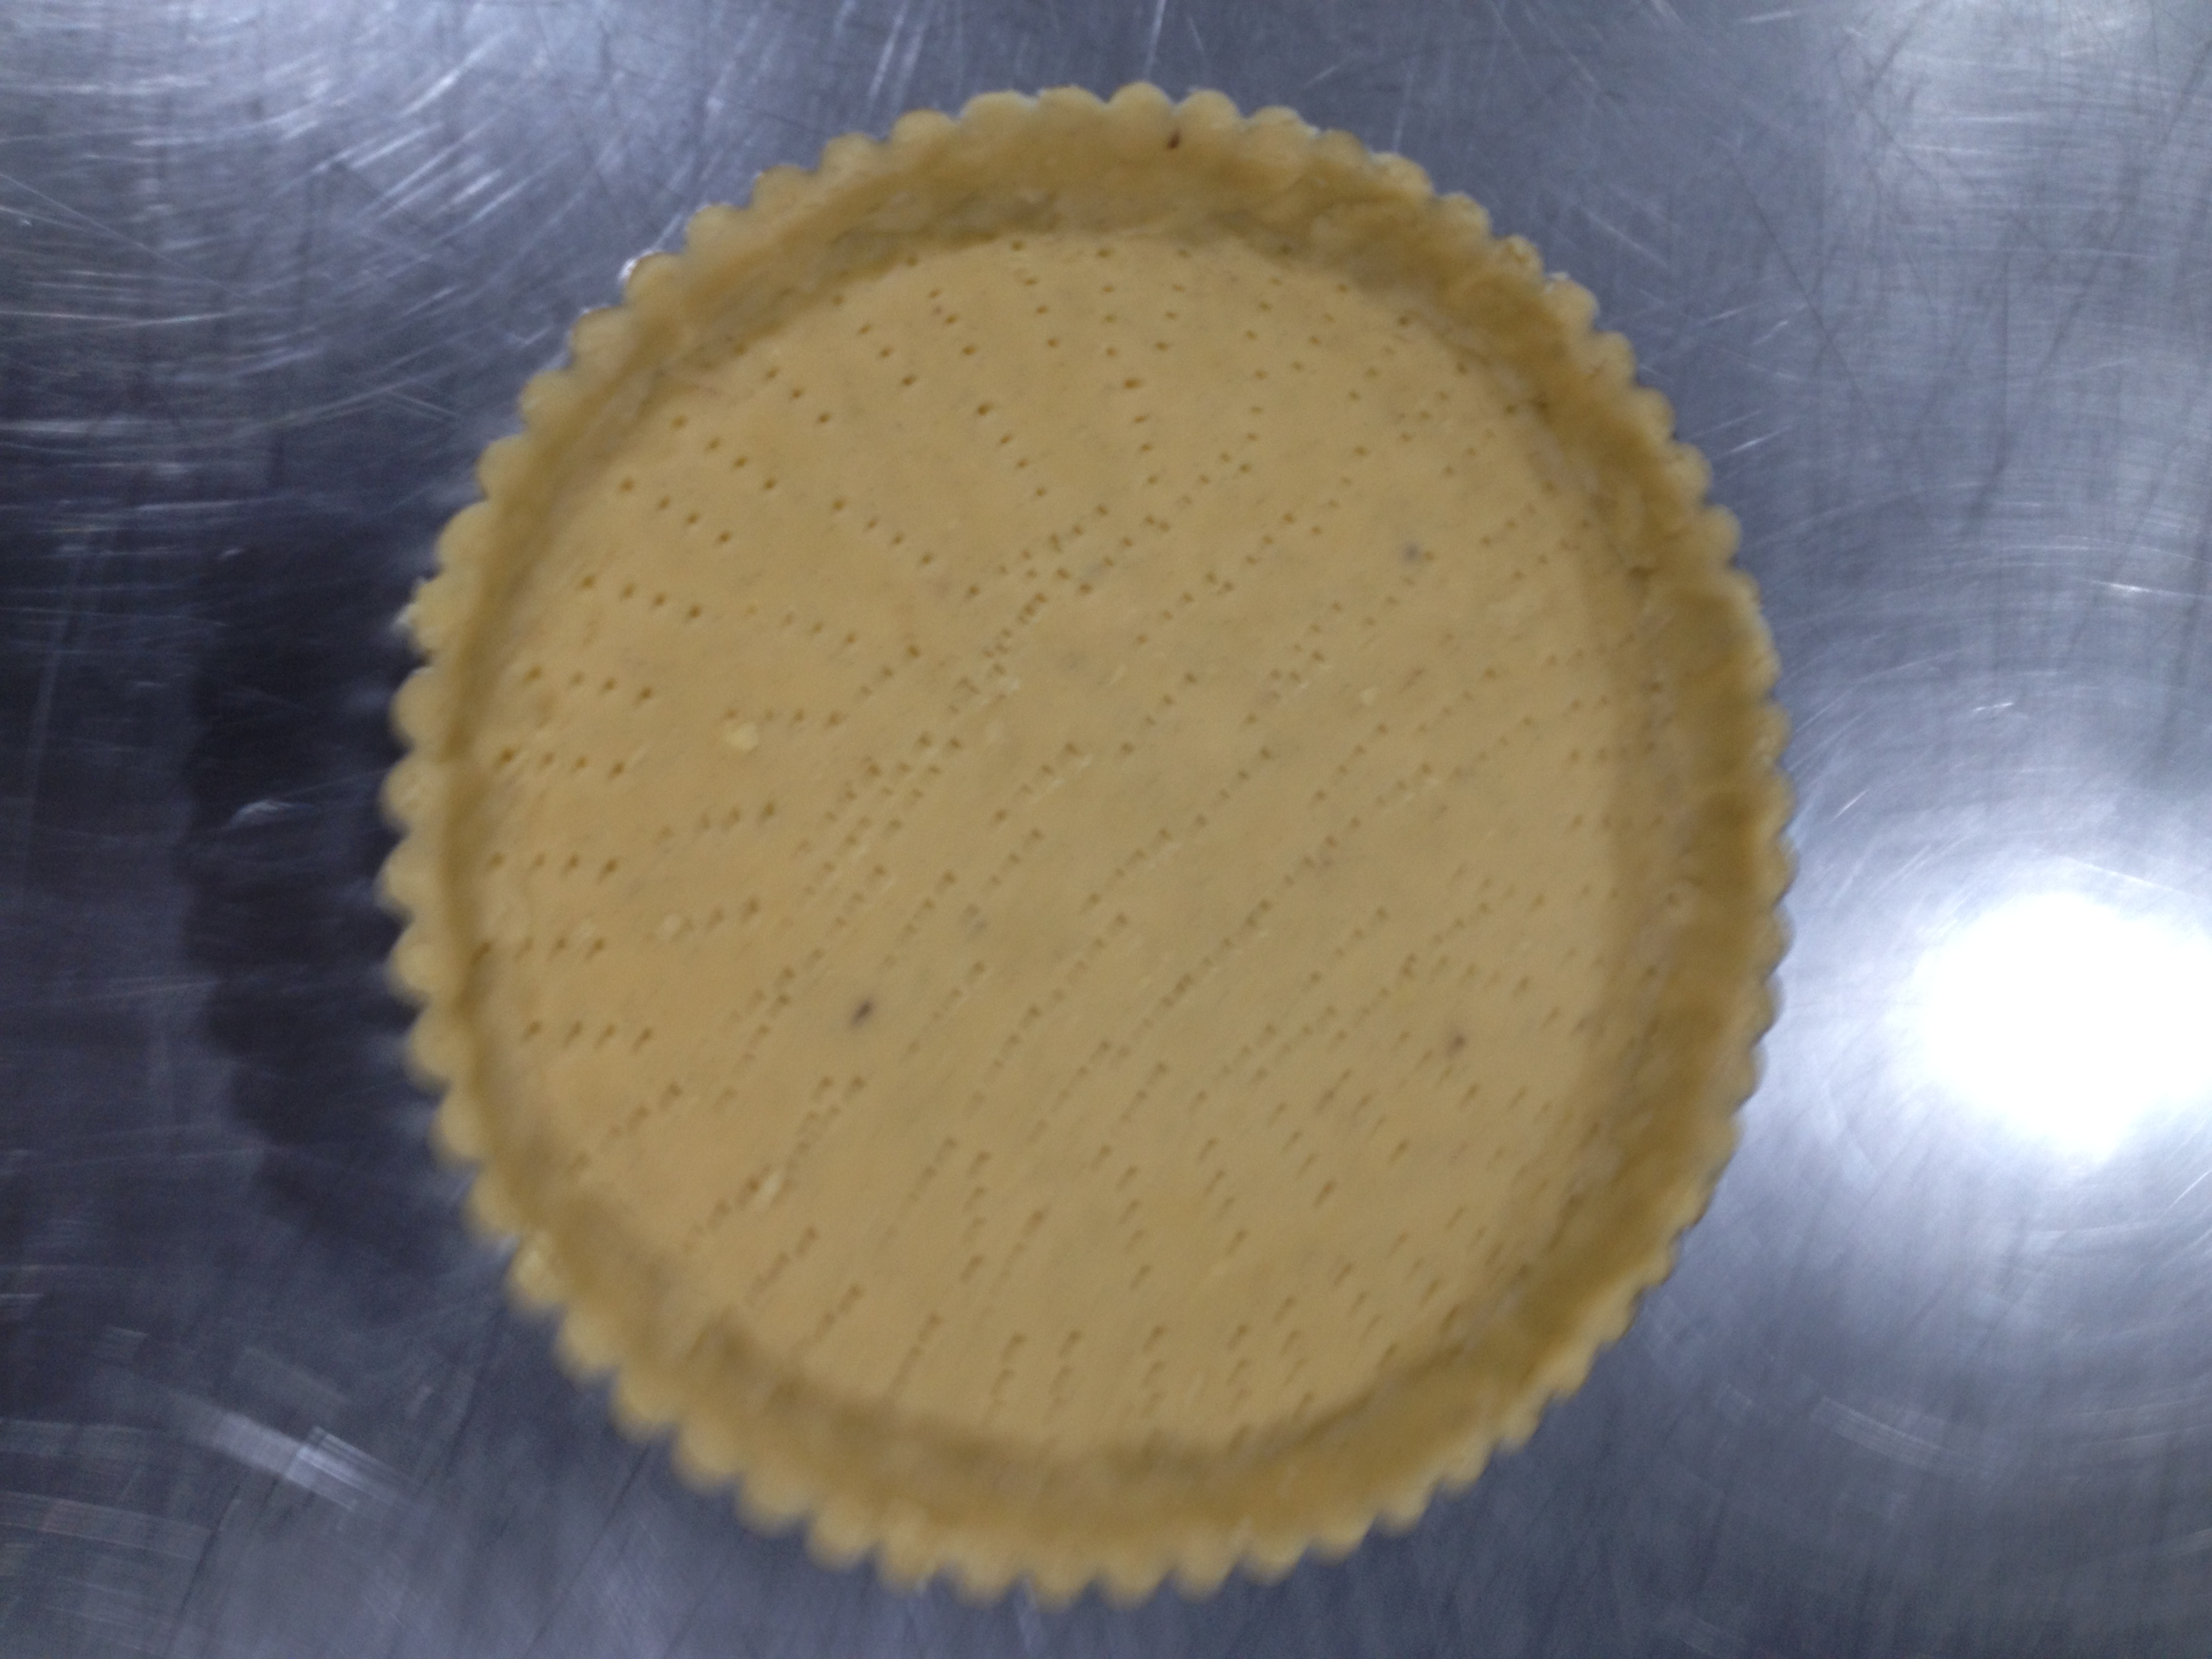
Return to the fridge for 30 minutes to rest. Take a nap if you like or grab a Jackie Collins novel and read for a bit.

Preheat oven to 150Celsius. Put the flan tin on a baking sheet this will catch drips and make it easy to carry.

Place a sheet of silicon paper over the tart shell and fill with beans/rice/bakers beads, pushing in to the corners. Blind bake for approximately 18 minutes, then remove the paper and whatever you used as weight, CAREFUL IT IS HOT!!

Return the pastry case to the oven to cook out a bit more around 5 -6 minutes. The pastry should look cooked but not too brown, think of a shortbread biscuit.

Crack the extra whole egg, whisk it up and then brush the pastry case with the egg. This is to seal the pastry and make it a bit more “water proof”. Return to the oven to cook for around 5 minutes.

Now you are ready to fill!!

LEMON FILLIING

Caster sugar – 195grams

Cream – 150grams Yeah I know I often weigh liquids)

Eggs – 5 (4 whole and 1 yolk)

Lemon –  2 1/2 juiced and strained

While your pastry is resting you can make the filling instead of reading or having a nap.

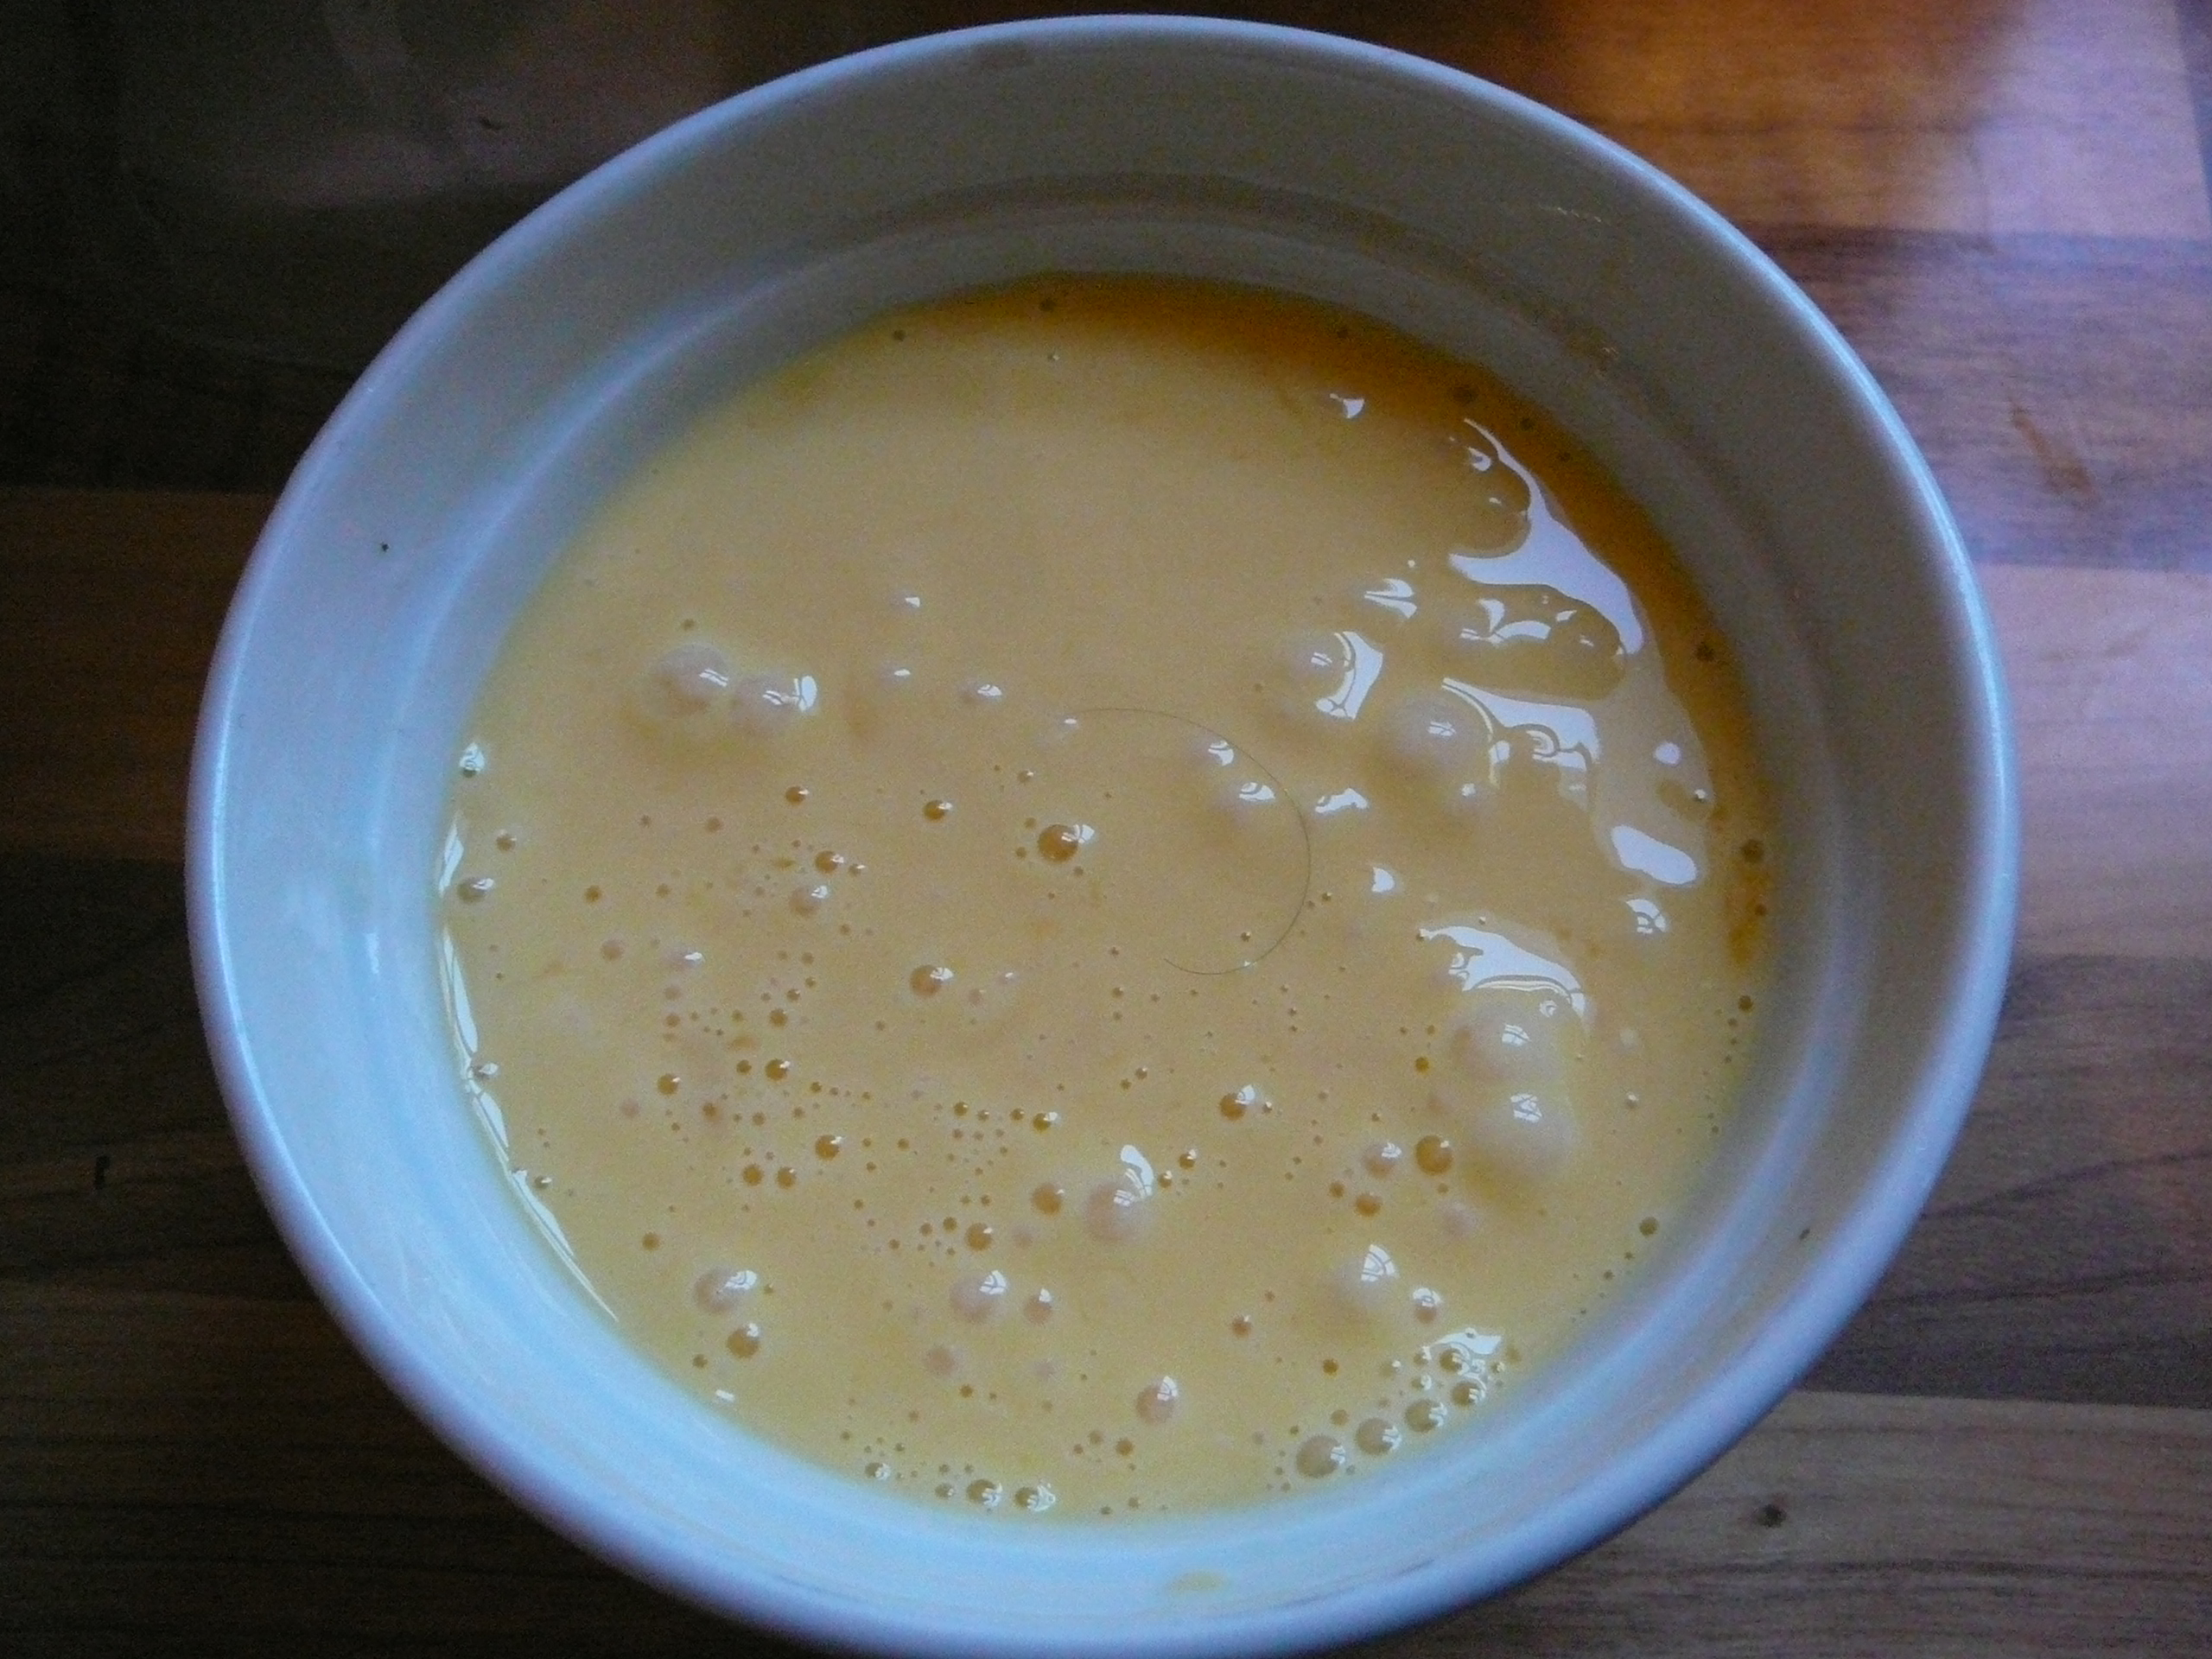
Whisk together lemon juice, cream, sugar, whole eggs and yolk until well combined but not frothy.

Strain in to a saucepan and over medium heat stir until you reach 60 celsius(digital thermometer time)

Strain in to a dry jug.

It needs to stand for a little bit and you will notice that the top has a layer of froth.

If you time it right this should coincide with the tart case finishing the final cook after being brushed with the egg.

Remove the tart from the oven and cool the oven down to 120 celsius and choose NO FAN. Return the tart to the oven, skim the froth off the top of the filling and pour the mixture slowly over the back of a large spoon in to the tart case. Pour slowly as you don’t want to form any bubbles. Having the fan off also helps form a nice smooth top.

Close the oven door and set the timer for 25 minutes. When the timer goes off give the tart a little jiggle, if it just wobbles a little it is ready. if it still looks quite liquid give it a couple more minutes until it just wobbles.

Remove from oven and cool to room temperature.

Finished product
Finished tart

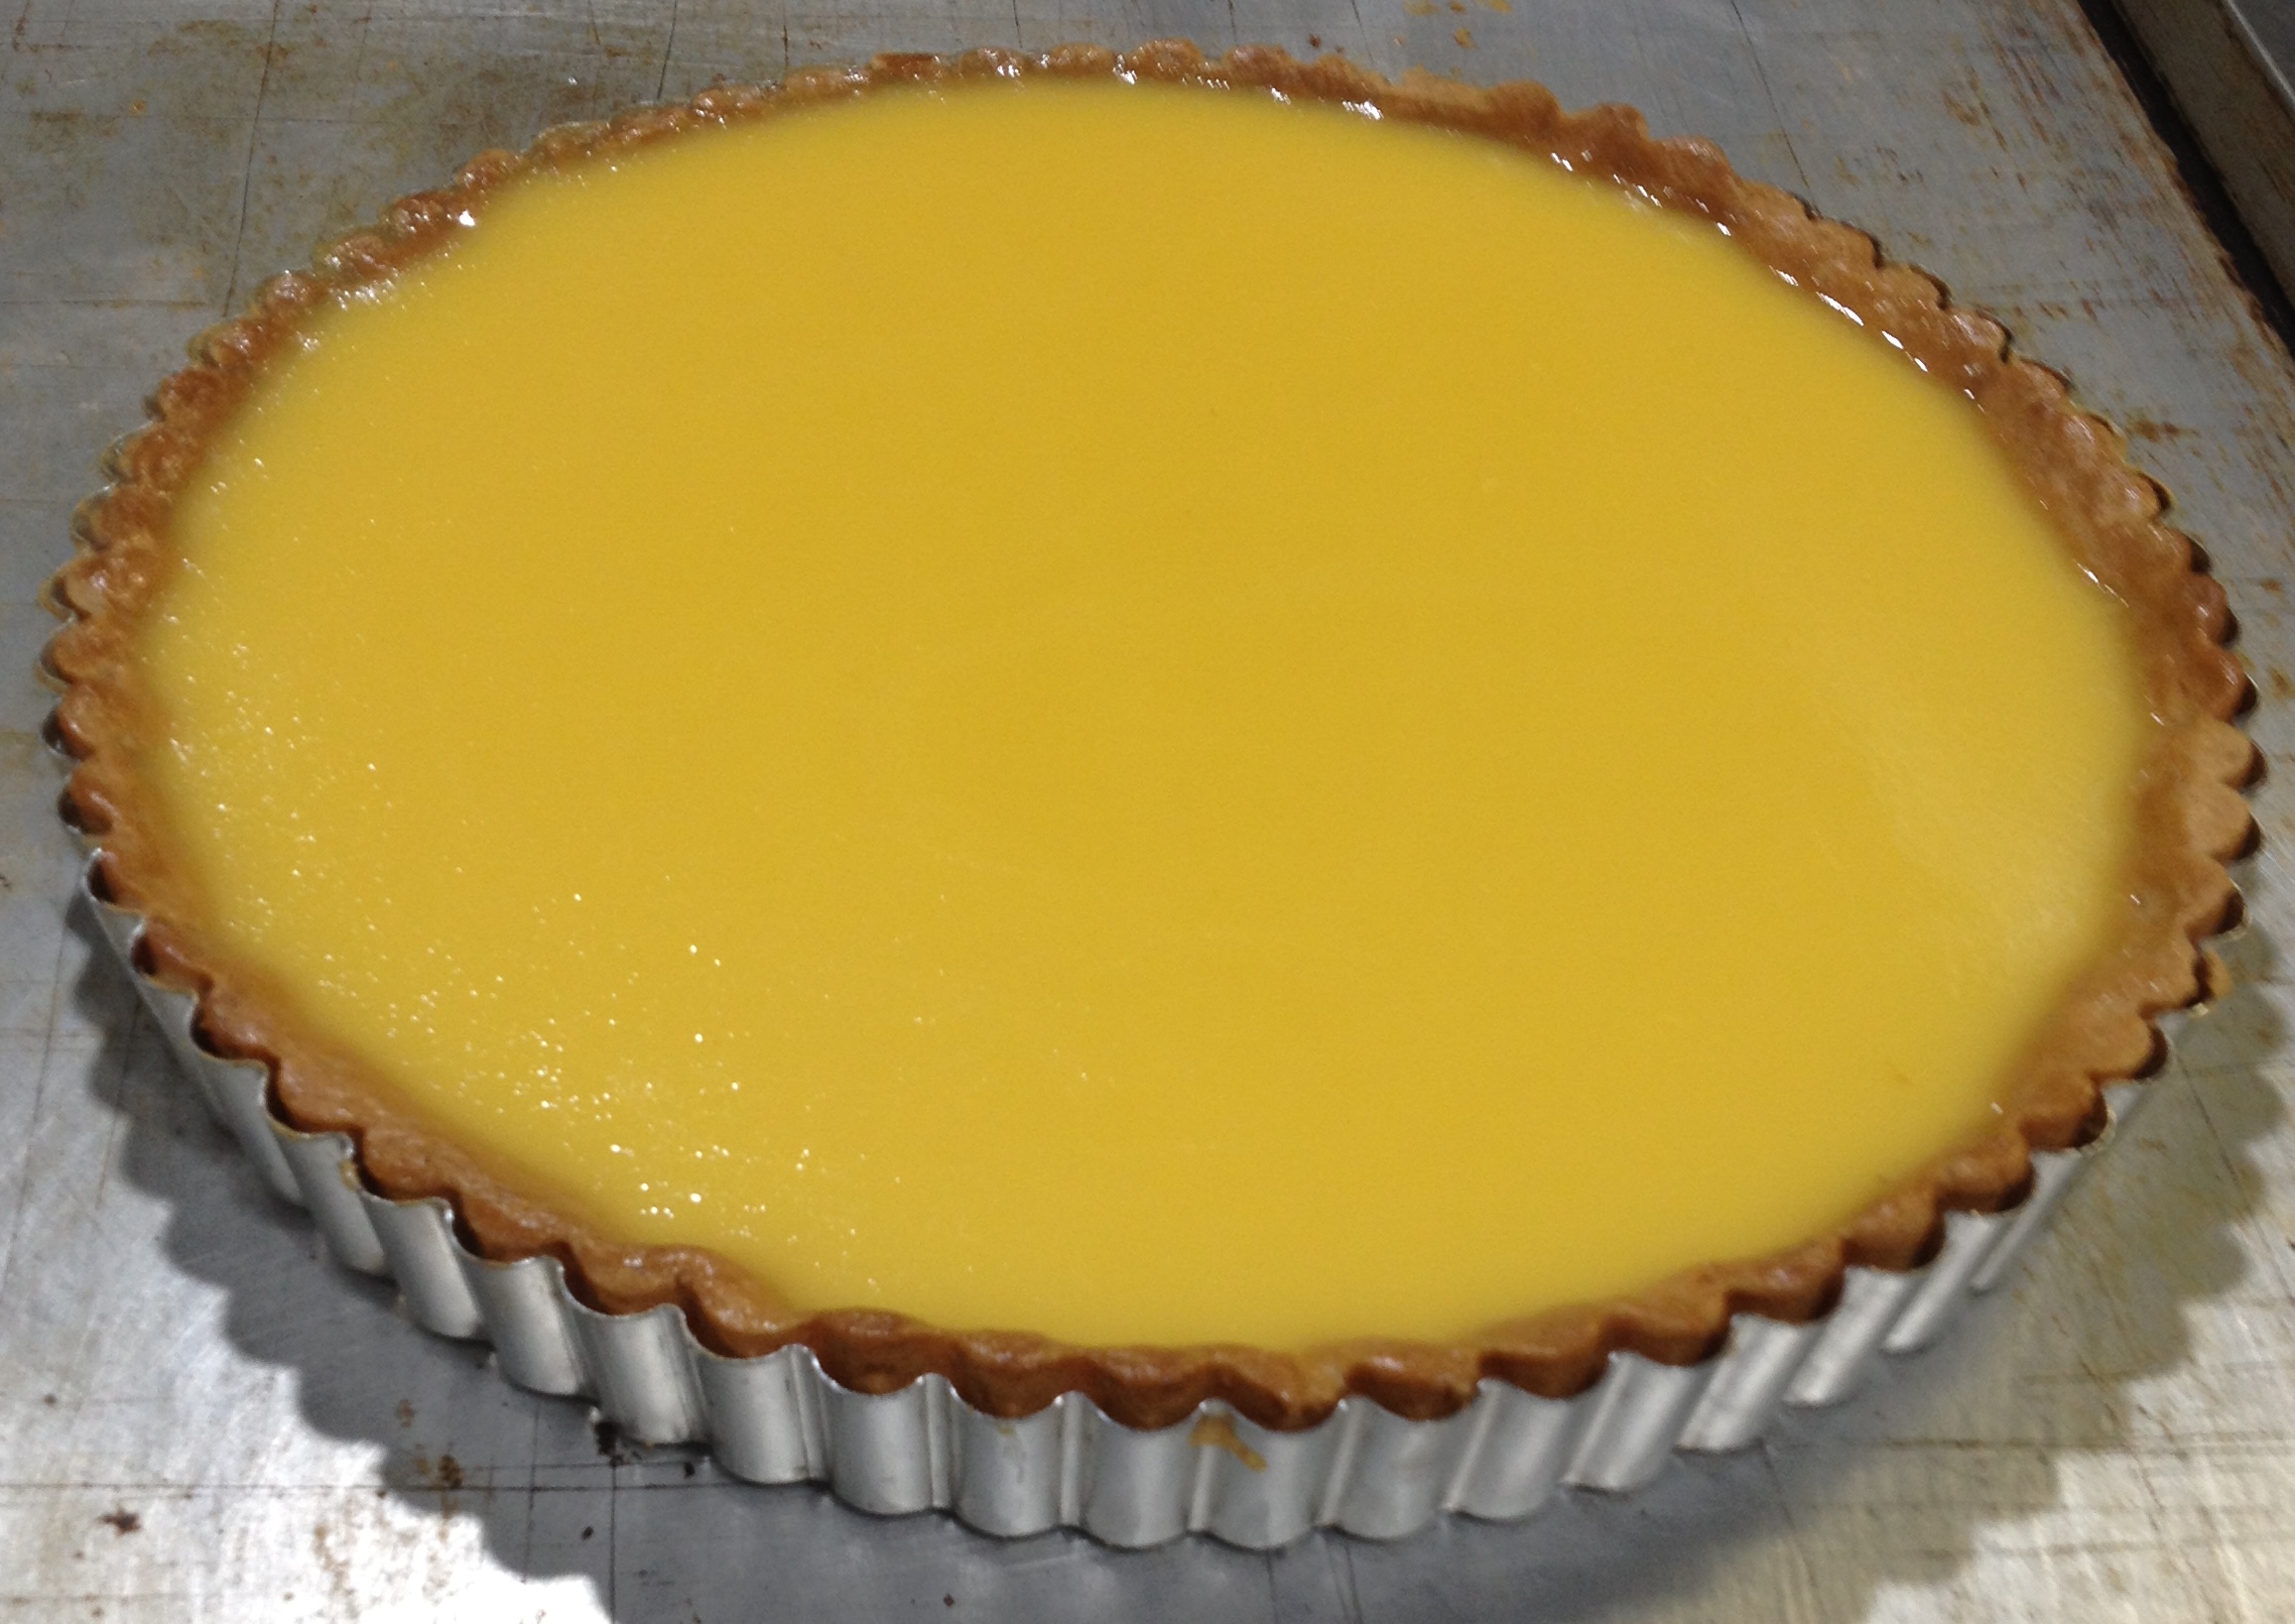
Serve with some mascarpone or whipped cream. You can sweeten the mascarpone a little if you like. You could also glaze the top of the tart by sprinkling a little sugar on top and caramelising with a butane torch.

Enjoy!


Chocolate Spiders – Recipe Time

When we were in our teenage years, one of the treats Mum used to make around Christmas for parties was chocolate spiders. So tasty, but eat too many and you were soon feeling a bit squeamish.

The other day while shopping I had a craving for some, I had a general idea on what was needed, peanut butter, chocolate and Chang’s noodle. I was about to ring Mum and get the recipe until I looked on the back of the noodle packet and there it was.

Only three ingredients needed and a short amount of time.

Peanut butter, noodles and chocolate

While making these I thought of another peanut butter and chocolate sweet that I like, Reese’s Peanut Butter Cups. All you would need to make your own version is the little paper cups, smooth peanut butter and leave out the noodles, SIMPLES!!

All measurements are metric and use Australian Standards sizing for spoons and cup measures.

The ingredients as found on the packet:

1 packet Chang’s Original Fried Noodles

200 grams Chocolate, milk OR dark ( I used milk)

2 Tablespoons crunchy peanut butter

MY METHOD:

Place peanut butter and chocolate in a clean dry bowl. Remember chocolate hates moisture, so ensure none gets in the bowl while you are melting it.

Ready to melt
Ready to melt

Place the bowl over a pot of simmering water and melt, stirring occasionally to combine.

All melted and mixed

Fold in the noodles to coat, being careful not to crush them too much.

Adding the noodles
Adding the noodles
Mixing in the noodles
Mixed and ready to shape

Lay a sheet of silicone paper(GladBake or similar) on a tray and using two teaspoons place the mixture on to the paper. You can also set these in little patty cases if you like.

Lined up ready to go in the fridge

Place in refrigerator to set.

When set, ATTACK!! Just not too many at once.

Ready to eat
Ready to eat

I hope you try these, especially for a Christmas treat!

Walnut Bread – Recipe Time

On our regular menu and recently used as part of a cheese board for one of our wine dinners, this walnut bread is quite easy and quick(ish) to make.

Cheese board with hous emade breads
Cheese board with house made breads

To save a bit of time kneading we mix the dough with a dough hook on the mixer and let it go for 6 to 9 minutes. Certainly saves some damage to the wrists and manicure.

(All measurements are metric and spoon measurements are Australian Standards sizing.)

WALNUT BREAD

Plain flour – 250 grams

Yeast – 2 teaspoons ( I use Lowan Instant Dried Yeast, which you can store in the freezer)

Honey – 1 ½ tablespoons

Extra Virgin olive oil – 2 tablespoons

Water (36 celsius) – 165 ml

Walnuts – 120G

Salt – pinch

Place all ingredients except walnuts in to bowl of mixer, mix on slow to combine and then turn to medium for 6 – 9 minutes. If you feel that it is too dry add a little water, if it seems too wet add a little flour.  It should form a nice ball but not be too firm.

Remove the dough from the bowl, spray  the bowl with oil spray and return the dough to the bowl, cover with a dampened cloth and leave in a warm spot. If your oven has a proving setting, take advantage of it.

While your dough is rising, break your walnuts up a bit. I just use my fingers and break them in about 6 pieces, you don’t want them too fine.

Spray a small loaf tin, ours are 21 x 5 x 5 cm. or you can free form it for a rustic look.

When the dough has doubled in size, approximately 45 minutes, turn it out on to a floured bench and knead lightly for 2 minutes and then push it in to a rectangular shape.  Lay the nuts over the dough and then roll it all up in to a sausage shape and then bring the ends into make a pile of dough again.

Now for  the hardest part, kneading with nuts. You knead for about 6 minutes by which time the nuts should be fairly well combined with the dough and not falling out. Don’t be too hard on the nuts while kneading, you don’t really want to crush them too much.

Shape the dough to fit you tin or if you are free forming, spray a heavy baking sheet with oil spray and form the dough in to a sausage shape and place on to the tray. Cover with the damp cloth and leave to rise for 45 minutes in a warm spot. If you a re free forming try to keep the cloth off the dough.

While you wait to for it to rise, have a coffee (or champagne) and  catch up on my blog.

Pre heat your oven to 170C fan forced.

I usually just give the top a quick spray with the oil spray before placing in the oven to cook for approximately 25 minutes. Should sound hollow wen tapped on the bottom if not give it a couple of minutes extra.

Place on a cooling rack to cool.

Slice to your desired thickness and serve with your favourite cheese selection. This goes really well with a nice soft cheese.

Hope you enjoy this recipe!

Quince, Pear and Hazelnut Crumble

The cooler weather is upon us and I got to have play at work. Quince is only available in the cooler months so I thought I would try a using it in a crumble. My previous encounters with quince has mainly been quince paste with cheese. Maybe next year I will have a go at making some as I have a recipe in either Maggie Beer’s cookbooks or Stephanie Alexander’s book.

I have never cooked quince before so after a bit of research I found bizzylizzysgoodthings.com with a recipe for slow cooked quinces.

I also had an inkling to make some salted caramel icecream to go with the crumbles, so a bit more research and I found a recipe on David Lebovitz’ website, davidlebovitz.com.

Time to get cooking. The quince was easy and took about three hours to cook. Next time I think I would use a little more water as the syrup became very thick, but I got the fruit to a beautiful deep red colour.

Quince ready to cook


Cooked Quince
Cooked Quince

I poached the pears simply in a little sugar syrup until cooked but still firm. The pears were Williams which were firm and great for cooking. I then diced the pears and quince, mixed them together, divided the mix in to ramekins with some syrup. I added the pear liquid to the thick quince syrup and this loosened it up nicely.

In our family our crumble topping always has rolled oats. I cream butter and brown sugar together, mix in some flour and then the rolled oats. For this crumble topping I also lightly toasted some hazelnuts, removed the skin and broke them up a little. I then added the nuts to the crumble mix and sprinkled the mixture over the fruit.

The crumble topping is

100g Unsalted butter

100g Brown sugar

80g plain flour

80g rolled oats (normal rolled oats not quick, or cut)

30g hazelnuts (or to taste)

Quince and pear crumbles ready for the oven.

To reheat them I preheated a fan forced oven to 180C and cooked them for about 20 minutes until they were hot.

For the icecream I just followed the recipe on David Lebovitz’s site.

The ice cream and the crumble together were a taste sensation!!

Looks like I will be preserving some quince this week ahead of using them for an upcoming wine dinner in September. Our GM loved the crumble and the salted caramel ice cream so much that she really wanted to use it for one of the wine dinners. The next wine dinner was already sorted so we get to do the crumble on the one after.

Thanks for dropping by!!

Christmas Pudding

For the first time in 10 or so years I decided to make our Christmas Pudding to take to Mr. CA4G’s sisters place for Christmas Lunch.

Growing up Mum and Nan made our Christmas pudding and the highlight for us children was to make our wishes when we got to have a stir. It was the only time we were allowed to do anything to the pudding. I can remember after they were boiled Nan and Mum would have puddings dangling from the beams of the verandah for at least 2 months before Christmas. Sounds like a lot of pudding with 2 people making them, but Nan used to send a couple to my Aunts in Victoria and my uncle in Sydney. I think one might also have gone international to Nan’s friend in New Zealand. Customs must have had a chuckle at that package. So by the time they were sent off Nan was left with one and Mum had 3 of which one would go in the freezer to have in winter.

There were two recipes that Mum and Nan used on a regular basis. The prize winning Singleton Show Pudding and Margaret Daggs Pudding. Last year I attempted Margaret Daggs recipe. I learnt that I should have gone with the full recipe and not cut it down, cut my calico to a smaller size(90 x 90cm is a bit too big), and get some decent twine.

The best part of cooking Christmas pudding is the smell in the kitchen while it boils away for 4 hours. Unfortunately I cooked mine at work this time and an industrial exhaust fan just doesn’t allow the aromas to linger too long. Oh well at least I was able to use the huge pots we have at work, otherwise I would have been in trouble at home as my pot isn’t quite big enough for the size puddings I had.

On to the recipe. You will need to start this a week or two ahead of time to get the fruit well macerated in the alcohol. If you have sixpences and threepences give them a boil before adding to the pudding. DO NOT USE DECIMAL CURRENCY!!

Margaret Daggs Christmas Pudding

Mixed fruit 1.875 Kg ( I  buy a large bag of mixed fruit and then add glace cherries, figs, dates, blackcurrants, cranberries etc to make it up to the weight required)

Alcohol(rum, brandy, vodka) 750ml(or more if you like)

Breadcrumbs 500g

Plain flour 125g

Butter, softened 250g

Brown sugar 250g

Eggs 6 (59g eggs)

Baking powder 1/4 teaspoon

Golden Syrup 1 Tablespoon

Mixed spice 1/2 teaspoon

Cinnamon 1/2 teaspoon

Nutmeg 1/2 teaspoon

Salt pinch

Vanilla 1 teaspoon

Place your fruit in to a container with lid and then pour the alcohol over it. Cover and leave for 1 to 2 weeks.

Dampen your pudding cloth and then dust liberally with flour. Depending how big you want your pudding you can get two big ones or three slightly smaller ones.

Put a water on to boil in large pot/s.

Cream the butter and sugar together until light and fluffy.

Add eggs one at a time mixing well between each.

Add golden syrup, and spices, stir to combine.

Sift flour and baking powder into a seperate bowl.

Alternatively stir in the breadcrumbs, flour and fruit until all added. When mixed gather the family members around to have  three stirs and make a wish(cooking with love added).

Mixing the pudding, 3 stirs then make a wish.

Place cloths over bowls and divide the mixture evenly between them. Put your sixpences and threepences in now if using them.

Dampen the cloth and flour it
Laying the cloth over a bowl to give shape to the mix

Pull the corners up, and then at the top of the pudding mix bring the fabric together and tie tightly with twine. We tie several times and go up the cloth a bit to keep it all together.

Tied up, good enough for Mr Grey?
Too much cloth, knotting away.

Place in to boiling water and then boil away for four to 5 hours, topping up the boiling water as needed.

Bubble bubble toil and trouble,oh look puddings
Bubble bubble toil and trouble, oh look puddings

When the time has come, lift the puddings from the water in to a colander and sit for several minutes. Using butchers hooks or similar hang the pudding to dry. A week is good but longer is ok as it will keep.

The puddings were hung by the exhaust hood with care.....
The puddings were hung by the exhaust hood with care…..

To reheat on Christmas Day, carefully remove the cloth and wrap in foil, place in 170C oven until hot. You can also add your sterilized coins after reheating by slipping one in to the slices of pudding.

For a bit of drama you can warm some brandy and pour it over the pudding and set it alight. Makes for a nice wow moment.

Our pudding
Our pudding

The pudding also freezes well.

Our family doesn’t use brandy custard on our pudding. We make rum sauce. Which is just milk, sugar, cornflour, vanilla, rum. You boil your milk with the sugar and vanilla add the rum and thicken with cornflour. Easy and you don’t have to worry about the eggs over cooking and becoming brandy scrambled eggs.

I hope your Christmas feast was a wonderful one and you kept family traditions alive!

Merguez Sausages and Cous Cous

About time for another recipe, I think all these travel posts are making me itch for another holiday. Wait, that’s right Tokyo this month.  Anyway, after reading a blog post from the also well travelled and well fed Lorraine from Not Quite Nigella, I discovered Vic’s Meats Market Day.

Held every Saturday at the Vic’s Meats factory in Mascot, it is a chance for the public to buy restaurant quality meat at great prices. Each week they have a different selection of sausages as well as the good old thick and thin beef sausages. So far one of our favourites has been the lamb merguez in the chipolata size. This is mainly because I serve it with cous cous and raita/tzatziki.

Yum! Merguez sausages

The recipe is enough for two people but you can increase quantities to suit.

For the raita/tzatziki:

200ml pot of Greek style yoghurt

½ clove of garlic, finely chopped

10 grams onion, finely diced

Mint, chopped finely

8cm piece of Lebanese cucumber, grated

Lemon, a quarter will be heaps, squeeze the juice out into bowl

Salt and pepper to taste

Put the grated cucumber in your hand and give it a good squeeze to remove most of the moisture.

Place all ingredients in a bowl and mix to combine well.

Raita/tzatziki ready to mix

For the cous cous

9 Merguez sausages, chipolata size

½ packet of pearl cous cous

50g finely diced onion

½ a garlic clove

1  cups chicken stock, salt reduced

1 Tablespoon currants

5 dried apricots, diced

20 Pisatchios, roasted and salted removed from shell

1 Tablespoon Extra virgin olive oil

1 Tablespoon chopped coriander (if you really love coriander add a little more)

Salt and pepper to taste

Ingredients for cous cous

Heat the oil in a small pan, sauté the onion and garlic until soft and translucent.

Add the Cous cous and lightly toast, then add chicken stock reduce heat and stir occasionally, until cooked, about 10 minutes.

Just before serving add the apricots, currants, coriander, pistachios, salt and pepper.

Cook the sausages how you like, I pan fried ours and added a little stock to help keep them moist.

When serving the cous cous I like to lightly press it in to a ring(I cheat and use a large size pastry cutter at home), and the arrange the sausages and raita/Tzatziki around or over it. Garnish with a nice sprig of coriander or mint if you like.

Couscous, merguez sausages, and raita/tzatziki

I hope you enjoy!

Truffle Roast Chicken

One final item I prepared using the fresh truffles recently was a roast chicken with truffles. This was another thing I have read about and wanted to do try for some time.

I am not going to specify a size for the chicken, as we are a two person household I only buy a smaller size 12 chicken. This recipe needs to be started the day before you want to cook it, this allows for the truffle to infuse the meat of the chicken.

1 free range organic chicken

20 gr Truffles, sliced (If using a larger bird, use more truffle)

60 g Butter, softened to room temperature

Salt and pepper

Wash your chicken inside and out. Dry with paper towel.

Gently separate the skin of the chicken from the breast meat.

Lay the slices of truffle over the exposed meat.

Form the butter in to two oval shaped pieces and lay on top of the truffles. (Alternatively you can finely grate the truffle into the softened butter and mix together before forming it to place on the chicken.)

Gently settle the skin of the chicken back over the butter/truffle. Truss your chicken with butchers twine.

Place in to baking dish and then cover securely with cling film and leave in fridge over night.

Before
Before

Remove chicken from oven ½ an hour before you want to start cooking it.

Preheat oven to 220C.

Remove the cling wrap and season the chicken with the salt and pepper. Drizzle with a little olive oil, place in oven and cook according to the size of chicken you have used, or until the juices run clear when tested.

After, love how the truffle is visible through the skin

Serve with your favourite vegetables and some gravy.

You could just use chicken breasts that have the skin on and place the butter under the skin the same way as the whole chicken. Just a quick seal in a fry pan before finishing in the oven would be a good idea.

Mr CA4G takes his own lunch to work so this week he had some rather decadent truffled chicken sandwiches.

Truffle Season

I bring you a service interruption to my recent travel posts. Having had all manner of exotic ingredients during our holiday (think foie gras, exotic mushrooms, bamboo clams, truffles) I was happy to receive an email from Bonnes Truffes letting me know that fresh Australian truffles were in season. I placed an order and eagerly awaited delivery of what Brillat Savarin called ‘diamonds of the kitchen’.

Black Truffle from Bonnes Truffes Southern Highlands NSW
Another angle of the truffle

Not having encountered a fresh truffle before Mr. CA4G and I realised quite quickly that they are rather pungent. Upon opening the package they were in, Mr. CA4G quickly asked what the stench was, thinking there was something off in the fridge. We had a bit of a laugh.

I also got to use the $60 truffle slicer that I bought two years ago. I knew I would have a use for it one day.

Truffle slicer - GEFU brand
My GEFU truffle slicer

My first plan for using them was scrambled eggs. To do this I needed an airtight container and some eggs. The eggs are placed in the container with the truffle for at least 24 hours. I would recommend a little longer, maybe two or three days. Then you make your scrambled eggs as normal.

Eggs with the truffle in their airtight jar

Personally I use about 3 tablespoons of cream for 5 eggs, a little salt and pepper, about 20 grams of butter melted in the pan. Whisk the cream and eggs and then in to the pan and gently stirred with a silicone scraper until they are cooked through.

Cream
Cream
Eggs and cream ready to go
Butter ready to melt
Just about ready
Just about ready

On to some toast and then I finely sliced some truffles over the top.

Truffle meets slicer
Ready to eat
Ready to eat

Delicious! So good in fact we had it two days in a row.

I also used the truffles for lunch with fresh pasta, a little onion and pancetta sautéed in olive oil, butter and lots of parmesan. I also shaved more truffle over the top. Not the healthiest option but certainly very tasty.

Home made pasta, Pancetta, parmesan and truffle

A delicious weekend all round.

I have a small piece left some eggs in with it for scrambled eggs on the weekend and another lot of the pasta. Can’t wait!

Beetroot Glaze

For the Henschke dinner I made this beetroot glaze to go with a stuffed lamb loin. As the lamb was quite fatty, the acidity in this beetroot glaze went really well with it and

cut through the fat. This is a recipe I have adapted from Masterchef tv show.

Stuffed lamb loin, rosemary and parmesan pommes anna, beetroot glaze


100g Beetroot, grated (I like finely grated, however coarsely grated is good too)

50 mls Port

50g brown sugar

40 mls sherry vinegar

40 sherry, pedro ximenez if possible

1 bay leaf

Place the brown sugar in a heavy based saucepan and caramelise slightly over medium heat.

Add remaining ingredients, reduce heat and simmer until the beetroot has softened and is cooked through. The liquid should have reduced to a thickish syrup.

Keep warm and serve with your desired meat.


Blog at WordPress.com.

Up ↑